
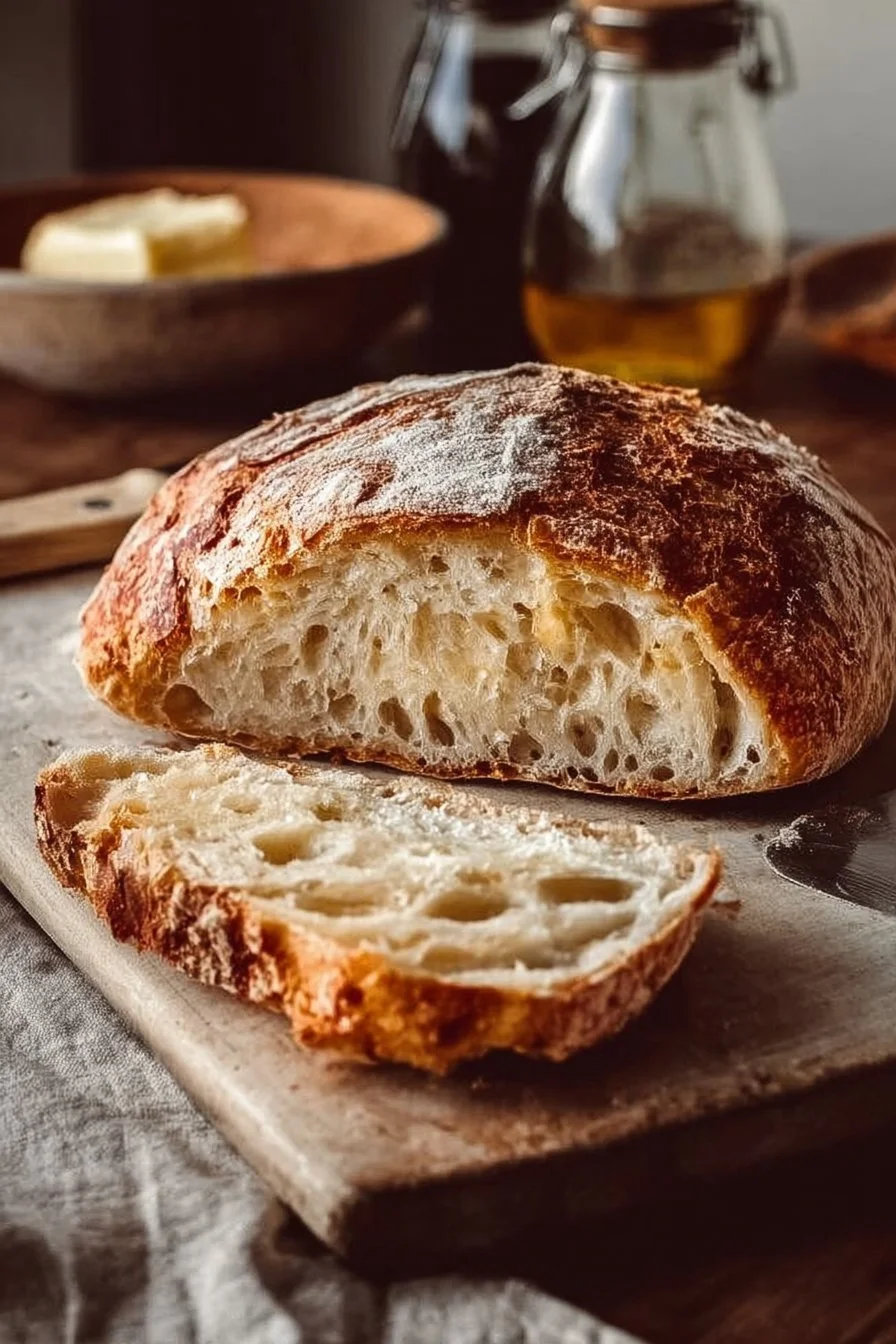
This sourdough loaf has a crackly, caramelized crust and a tender, open crumb that tastes tangy, slightly sweet, and utterly comforting. It’s the kind of bread that fills the kitchen with warm, yeasty aroma and makes simple meals feel special — toasted with butter, as the base for avocado toast, or alongside a bowl of soup. The method is straightforward: mix, rest, stretch-and-fold, shape, cold-proof, and bake in a hot Dutch oven for dramatic oven spring. If you want more tips or a printable reference while you bake, check our sourdough bread recipe page for a handy guide. Follow this recipe as written and you’ll have a beautiful loaf that tastes like you spent hours at a bakery, even if most of the time is hands-off.
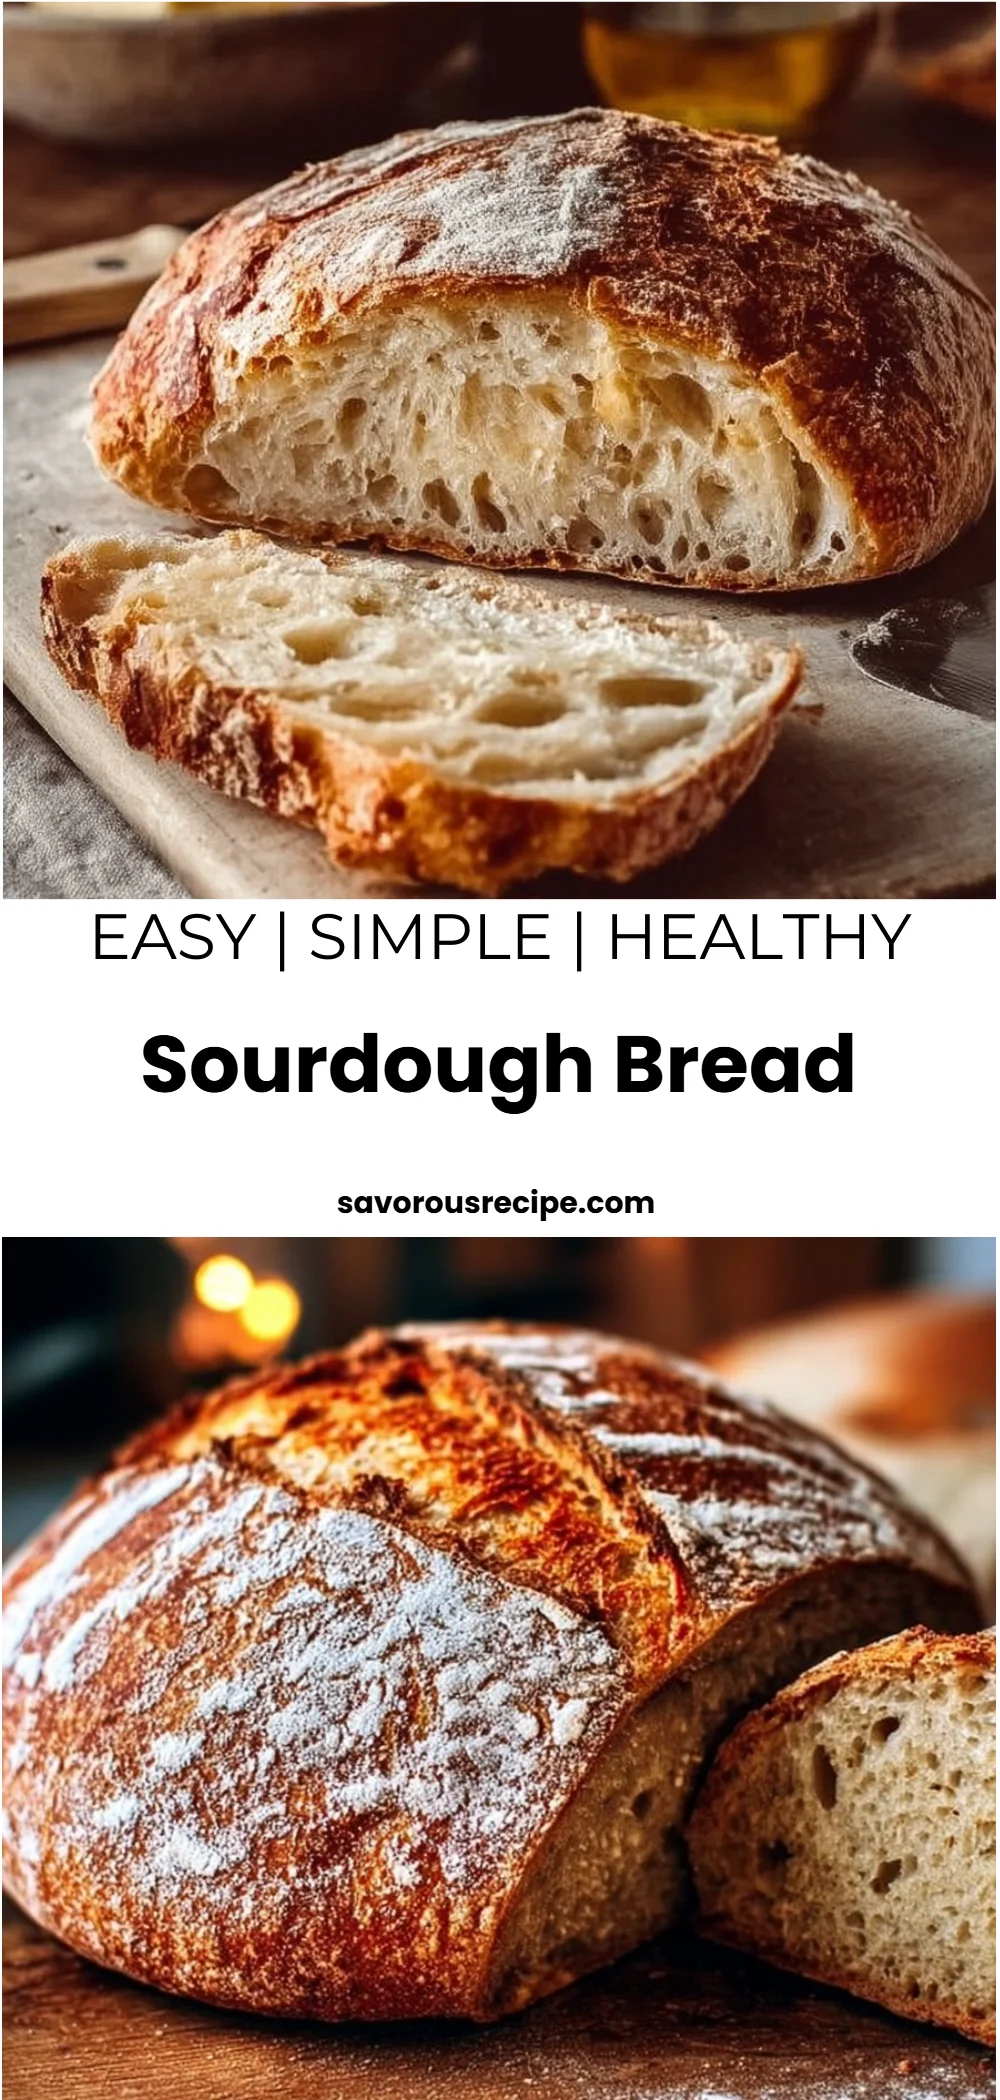
Why You’ll Love This Sourdough Bread
- Classic tangy flavor balanced by a hint of sweetness from long fermentation.
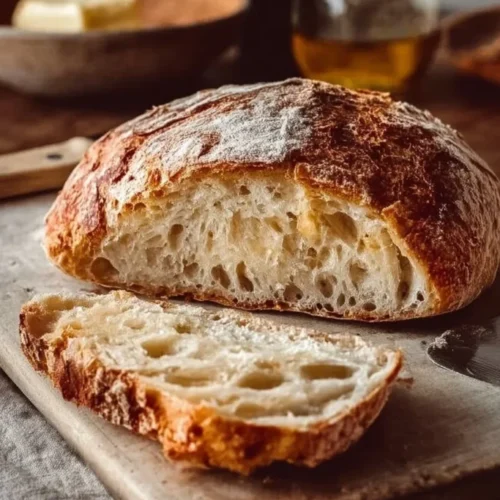
- Crispy, deeply browned crust with a soft, airy interior — perfect for sandwiches or toast.
- Mostly hands-off: the bulk of the time is resting and folding rather than kneading.
- Uses just four simple ingredients you likely already have: flour, water, starter, and salt.
- The overnight cold proof makes scheduling easy — bake when you’re ready.
- Versatile: shape round or oval and slice thick for toast or thin for sandwiches.
- Great beginner sourdough formula to build confidence with stretch-and-fold technique.
What Is Sourdough Bread?
Sourdough bread is a naturally leavened loaf made with an active wild-yeast starter instead of commercial yeast. It develops flavor through fermentation, which produces that characteristic tang and a more complex crumb than quick breads. The texture is a chewy, open crumb with large irregular holes when well-proofed, and a crackly, caramelized crust when baked in a preheated Dutch oven. Sourdough is commonly served at breakfast and brunch (think thick toast and eggs), as a dinner accompaniment to soups and stews, or simply sliced fresh for sandwiches. The overall vibe is homey and artisanal — comforting, a little rustic, and endlessly rewarding.
Ingredients for Sourdough Bread
For the loaf
- 4 cups (500 g) bread flour or all-purpose flour
- 1⅔ cups (375 g) warm water
- 1 cup (200 g) active sourdough starter
- 2 teaspoons (10 g) salt
Use the ingredients exactly as listed for best results.
Ingredient Notes (Substitutions, Healthy Swaps)
- Flour: Bread flour gives more structure and larger holes thanks to higher protein. All-purpose flour works fine if that’s what you have on hand.
- Starter: Use an active, bubbly starter that has been fed within 4–12 hours and is at peak. If your starter is sluggish, feed it ahead of time to build strength.
- Salt: You can use kosher or table salt; the recipe calls for 2 teaspoons. If using kosher salt, weigh it if possible (10 g) because grain size varies.
- Warm water: "Warm" means comfortably warm to the touch (around 75–85°F / 24–29°C). It helps kickstart fermentation but don’t use hot water.
- Gluten-free: This recipe relies on gluten development; converting to gluten-free would require a different formula and binders (not recommended here).
- Lower-sodium: You can reduce salt slightly (try 1½ teaspoons) but note salt helps flavor and controls fermentation.
Step-by-Step Instructions
Follow these condensed, clear steps to take the dough from shaggy mass to a bakery-worthy loaf.
Step 1 – Mix flour and water (autolyse)
- In a large mixing bowl, combine 4 cups of flour and 1⅔ cups warm water. Stir until a shaggy dough forms, then let it rest for 30 minutes.
Visual cue: The dough should look rough and slightly dry on the surface but hydrating — not a smooth ball.
Step 2 – Add starter and salt
2. After the 30-minute rest, add 1 cup active sourdough starter and 2 teaspoons salt. Mix well until everything is fully combined and there are no large streaks of flour.
Pro cue: Use a Danish dough whisk or your hands; wetting your hands slightly prevents sticking.
Step 3 – Bulk fermentation with stretch-and-folds
3. Cover the bowl with a towel or plastic wrap and let the dough sit at room temperature. Every 30 minutes for 2 hours, perform a set of stretch-and-folds (4 folds per set): pull one side of the dough upward and fold it over itself, then turn the bowl a quarter turn and repeat three more times. After the final fold, cover and let the dough rise for 6 to 8 hours total.
Visual cue: During bulk fermentation the dough should become puffier, bubbly, and roughly double in size.
Step 4 – Shape the dough
4. Gently transfer the dough to a lightly floured surface. Shape it into a round or oval loaf by folding and tucking the edges underneath to create surface tension. Place the shaped dough seam-side up into a floured proofing basket or towel-lined bowl. Cover and refrigerate for 8 to 12 hours.
Pro cue: A cold retarded proof overnight develops flavor and makes the dough easier to score.
Step 5 – Preheat the Dutch oven
5. The next day, place a Dutch oven in the oven and preheat to 450°F (232°C) for at least 30 minutes so the pot is very hot.
Step 6 – Score and bake
6. Remove the dough from the fridge and turn it out onto parchment paper, seam-side down. Score the top with a sharp knife or razor blade to control expansion. Using the parchment, carefully lower the dough into the hot Dutch oven. Cover and bake for 20 minutes, then remove the lid and bake uncovered for another 25 minutes until deeply golden and crisp.
Step 7 – Cool before slicing
7. Remove the bread from the Dutch oven and let it cool completely on a wire rack before slicing (at least 1–2 hours).
Visual cue: The crust will sound hollow when tapped and the crumb will set as it cools.
Pro Tips for Success
- Feed your starter: Use a lively, active starter at peak rise for best oven spring and flavor.
- Temperature control: Room temperature fermentation can vary — cooler houses lengthen proofing, warmer speeds it up. Aim for 75–78°F if possible.
- Hydration awareness: This formula is moderately wet. If dough feels impossibly sticky, dust lightly with flour when shaping, but avoid adding too much extra flour.
- Stretch-and-fold technique: Be gentle; you’re building structure without kneading. Tension, not force, creates good crumb.
- Cold proof time: Don’t skip the 8–12 hour fridge rest — it develops flavor and firms the dough for shaping and scoring.
- Scoring matters: Score right before baking and make decisive cuts at an angle to control the expansion and create a dramatic ear.
- Bake in a preheated pot: The hot, enclosed environment traps steam and produces a crisp crust and good oven spring.
Flavor Variations (OPTIONAL)
These keep the base recipe intact — add them only during mixing or shaping as noted.
- Olive & Rosemary (optional): Fold in 1/2 cup chopped olives and 1 tablespoon chopped rosemary during shaping for a savory loaf.
- Garlic & Herb (optional): Add 1–2 teaspoons garlic powder and 1 tablespoon mixed dried herbs to the dough for a fragrant twist.
- Seeded Top (optional): Sprinkle sesame, poppy, or sunflower seeds on the scored loaf before baking for texture.
- Spicy Pepper Flakes (optional): Mix 1–2 teaspoons red pepper flakes into the dough for a subtle heat.
- For a completely different quick option, you might enjoy our cheddar cheese quick bread recipe when you want a faster loaf that’s still full of flavor. (Optional)
Serving Suggestions
- Thick-sliced and toasted with butter and flaky sea salt for breakfast.
- As the base for open-faced sandwiches with roasted vegetables or smoked salmon.
- Paired with a bowl of tomato soup or hearty stew for cozy dinners.
- Use for grilled cheese — the sturdy crust and open crumb create extra melty goodness.
- Serve alongside a cheese board with soft cheeses, fruit, and honey for gatherings.
- Bring to brunch cut into slices with olive oil and balsamic for dipping.
Make-Ahead, Storage & Reheating
- Make-ahead: You can complete the bulk ferment and refrigerate the shaped dough for 8–12 hours (as the recipe directs). This is the best way to time baking for the next day.
- Refrigerator storage: Once baked and cooled, wrap the bread in a clean kitchen towel or store in a paper bag for 2 days at room temperature. The crust will soften over time; the crumb stays tender.
- Reheating: Refresh slices in a 350°F (177°C) oven for 5–10 minutes to restore crispness. For a single slice, toast until golden.
- Note: Avoid wrapping hot bread tightly — allow it to cool fully first to prevent sogginess.
Storage and Freezing Instructions
- Freezing: This loaf freezes well. Slice before freezing and store slices in a freezer bag with excess air removed. Freeze up to 3 months. Toast or warm slices directly from frozen.
- Whole loaf freezing: You can freeze a whole cooled loaf, wrapped tightly in plastic and foil. Thaw at room temperature and refresh in a 350°F oven for 10–15 minutes.
- If you don’t want to freeze: Use day-old bread for croutons, stuffing, or breadcrumbs to avoid waste.
Nutrition Facts (Per Serving)
| Calories | Protein | Carbs | Fat | Fiber | Sodium |
|———|——–|——|—–|——|——-|
| 182 kcal | 6.5 g | 38 g | 1.5 g | 1.7 g | 333 mg |
Nutrition values are estimates and may vary depending on ingredients and portion sizes.
FAQ About Sourdough Bread
Q: My loaf didn’t rise much — what went wrong?
A: Most often your starter wasn’t active enough or the dough was too cold. Use a bubbly starter at peak activity and keep bulk fermentation in a warmer spot.
Q: The crumb is dense — how can I get more open holes?
A: Increase hydration slightly (if you’re experienced) or ensure proper stretch-and-folds and a full bulk fermentation so the dough develops strength and gas retention.
Q: How do I know when the dough has doubled?
A: Use the “finger poke” test: a gently pressed indentation should spring back slowly but not completely. Visible puffiness and a bubbly surface are also good signs.
Q: Can I bake without a Dutch oven?
A: You can bake on a preheated baking stone with a steam tray (hot pan of water) to simulate steam, but oven spring and crust color may differ.
Q: How should I reheat slices to keep them crisp?
A: Reheat in a 350°F oven for 5–10 minutes or toast directly for a crunchy exterior and warm interior.
Q: How long will leftover sourdough keep at room temperature?
A: Wrapped in a towel or paper bag, 2–3 days is typical before the crust softens significantly. Freeze to preserve longer.
Notes
- Slice with a serrated knife once the loaf is fully cool to avoid gummy crumbs.
- For a shiny crust, brush with a tiny amount of water before scoring (optional).
- To add visual interest, sprinkle flour over the proofing basket and invert to transfer a flour-dusted top before baking.
- If you like an extra tang, extend the cold proof toward the longer end (12 hours) — but don’t overdo it or the dough can become overproofed.
- For cleaner scoring, use a blade held at a shallow angle and make quick, confident cuts.
Sourdough Bread Loaf
Ingredients
For the loaf
- 4 cups bread flour or all-purpose flour Bread flour gives better structure; all-purpose flour is a suitable alternative.
- 1 ⅔ cups warm water Water should be comfortably warm to the touch (75–85°F).
- 1 cup active sourdough starter Use a bubbly starter that has been fed within 4–12 hours.
- 2 teaspoons salt Can use kosher or table salt; weigh for accuracy.
Instructions
Preparation
- In a large mixing bowl, combine 4 cups of flour and 1⅔ cups warm water. Stir until a shaggy dough forms, then let it rest for 30 minutes.
- After the 30-minute rest, add 1 cup active sourdough starter and 2 teaspoons salt. Mix well until everything is fully combined.
- Cover the bowl and let the dough sit at room temperature. Every 30 minutes for 2 hours, perform a set of stretch-and-folds.
- Gently transfer the dough to a lightly floured surface. Shape into a round or oval loaf and place it seam-side up in a proofing basket or bowl. Cover and refrigerate for 8 to 12 hours.
- Preheat a Dutch oven in the oven at 450°F (232°C) for at least 30 minutes.
- Remove the dough from refrigeration, turn it out onto parchment paper, and score the top with a sharp knife.
- Carefully lower the dough into the hot Dutch oven, cover, and bake for 20 minutes. Then remove the lid and bake uncovered for another 25 minutes.
- Remove the bread from the Dutch oven and let it cool on a wire rack for at least 1–2 hours before slicing.