

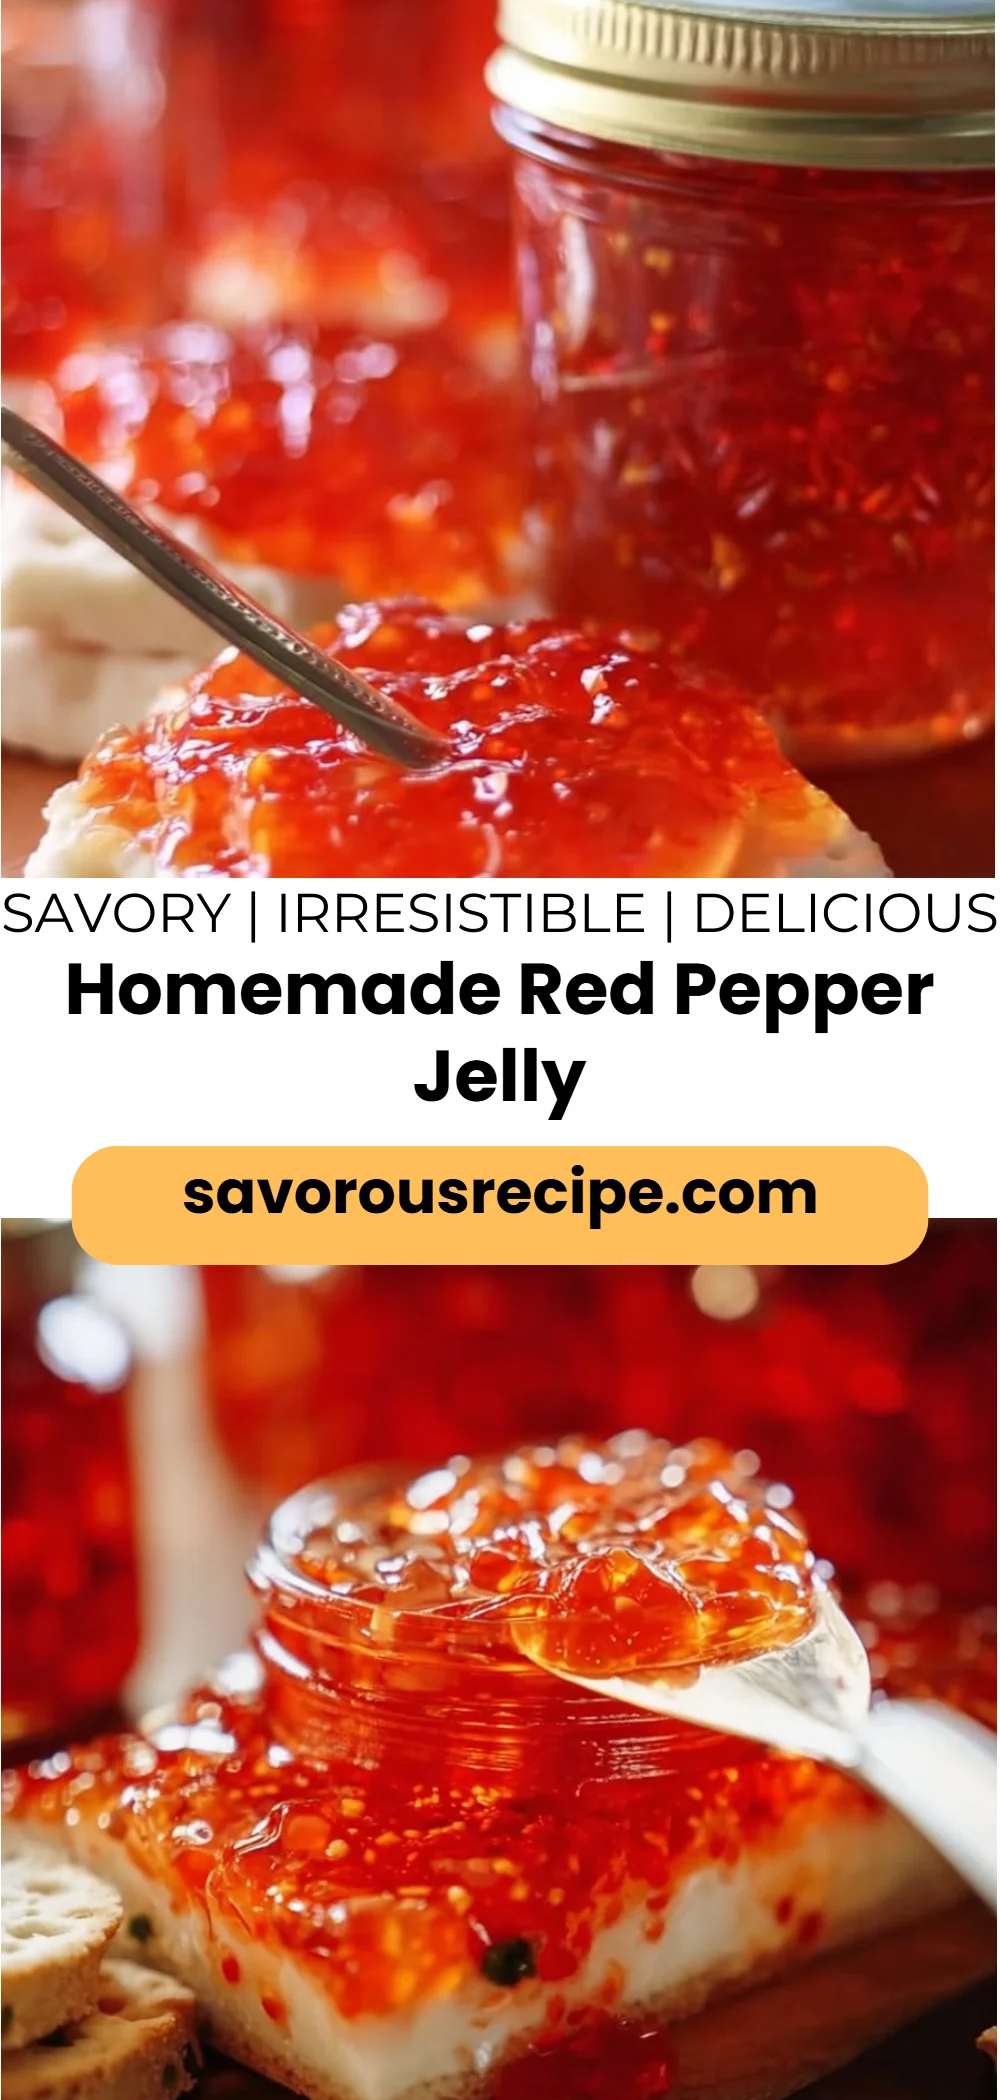
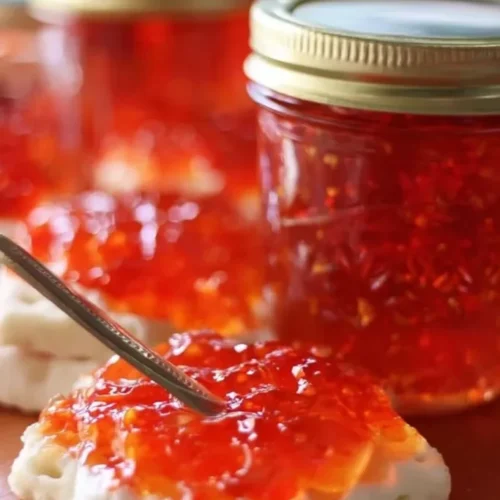
Bright, glossy, and just a little bit sweet with a mild tang, this homemade red pepper jelly is the kind of spread that turns ordinary crackers, cheeses, or roasted meats into something special. The texture is silky — a smooth pepper purée thickened to a tender jelly that spreads easily but still holds its shape. It’s an approachable recipe: no fancy equipment, just a blender, a saucepan, and a few pantry staples. Make a batch for brunch, spoon it over warm biscuits, or use it as a show-stopping appetizer topping — and if you love a sweet-savory glaze over rice, try pairing it with this hearty rice recipe: 5-ingredient souper rice for an easy weeknight boost.
Why You’ll Love This Homemade Red Pepper Jelly
- Bright, natural red pepper flavor with a balanced sweet-tart finish.
- Smooth, spreadable texture that works as a dip, glaze, or sandwich spread.
- Made from simple pantry ingredients — no specialized canning skills required.
- Quick to prepare: mostly blending and a short simmer, ready in under an hour.
- Versatile — great on cheese boards, appetizers, or spooned over grains.
- Keeps well in the refrigerator for several weeks, so a single batch can last.
- Kid-friendly and crowd-pleasing: mild heat with plenty of approachable sweetness.
- A beautiful homemade gift — jars look lovely tied with a ribbon.
What Is Homemade Red Pepper Jelly?
Homemade red pepper jelly is a sweet, slightly tangy preserve made primarily from red bell peppers, sugar, vinegar, and pectin. The peppers are pureed into a smooth base, cooked with sugar and vinegar, then thickened with fruit pectin into a glossy jelly. It tastes fruity and sweet up front, with the mellow vegetal notes of roasted red peppers, then finishes with a subtle tang from the apple cider vinegar and lemon juice. The cooking method is stovetop simmering until the pectin activates and the mixture sets. People commonly serve red pepper jelly as a condiment — on crackers with cream cheese, slathered on grilled chicken, or spooned over biscuits — and it’s the kind of cozy, everyday condiment that elevates brunches and party platters alike.
Ingredients for Homemade Red Pepper Jelly
For the Jelly
- 1 pound red bell peppers, chopped (about 2–3 medium peppers)
- 1 cup sugar (200 g)
- 1 cup apple cider vinegar (240 ml)
- 1/2 cup water (120 ml)
- 1 tablespoon lemon juice (15 ml)
- 1 package (1.75 oz) fruit pectin (powdered)
- 1/4 teaspoon salt
Ingredient Notes (Substitutions, Healthy Swaps)
- Sugar: White granulated sugar is listed and works best for proper gelling. If you want a slightly deeper flavor, you can try light brown sugar (optional), but note the jelly color and set may change.
- Apple cider vinegar: White wine vinegar or plain white distilled vinegar can be used in a pinch, but the flavor profile will be brighter and less fruity.
- Lemon juice: Fresh lemon juice gives the best brightness; bottled lemon juice will work if fresh isn’t available.
- Fruit pectin: The recipe uses one package (1.75 oz) of powdered fruit pectin. If you only have low-sugar pectin, follow the package instructions and expect slight texture differences — this is an optional swap and may alter cooking timing.
- Salt: Reduce or omit for a low-sodium option, though a little salt helps lift the flavors.
- Note on sweeteners: Replacing all the sugar with syrupy alternatives (like honey) is not recommended as it can affect pectin’s ability to gel properly.
Step-by-Step Instructions
Step 1 – Prepare the Peppers
Place the chopped red bell peppers in a blender or food processor and puree until completely smooth.
Visual cue: The mixture should be glossy and free of large chunks, resembling a thick vegetable purée.
Step 2 – Combine the Base
In a large saucepan, combine the pureed peppers, sugar, apple cider vinegar, water, and lemon juice.
Visual cue: The raw mixture will be loose and slightly frothy from the blended peppers.
Step 3 – Heat to Boil
Bring the mixture to a boil over medium heat, stirring constantly to dissolve the sugar and prevent scorching.
Pro cue: Use a heavy-bottomed saucepan to distribute heat evenly and stir with a heatproof silicone spatula to reach the pan’s edges.
Step 4 – Add Pectin and Salt
Once the mixture is boiling, stir in the fruit pectin and the 1/4 teaspoon salt until fully incorporated.
Visual cue: The liquid will start to tone down from a rolling boil and become thicker as the pectin hydrates.
Step 5 – Finish Cooking
Continue to cook for 1–2 minutes after adding the pectin, stirring constantly, until the mixture noticeably thickens.
Pro cue: Don’t overcook — prolonged boiling can break down the pectin and affect the final set.
Step 6 – Jar the Jelly
Remove the saucepan from heat and carefully pour the hot jelly into sterilized jars.
Visual cue: The jelly should be shiny and have a syrupy, pourable consistency as you ladle it into jars.
Step 7 – Cool and Store
Allow the jars to cool to room temperature before sealing and refrigerating.
Pro cue: Cooling lets the jelly finish setting; chilled jelly will be firmer than warm jelly.
Pro Tips for Success
- Measure precisely: Pectin and sugar ratios are important for a reliable set, so measure ingredients carefully.
- Keep stirring: Constant stirring during the boil prevents scorching and ensures an even texture.
- Use a heavy pot: A heavy-bottomed saucepan reduces hotspots and keeps the jelly from sticking.
- Test the set: If you’re unsure, chill a small spoonful for a minute — it should thicken noticeably when cold.
- Work with hot jars: Sterilize jars and pour hot jelly into warm jars to reduce the chance of breakage.
- Avoid overcooking: The recommended 1–2 minutes after adding pectin is enough; longer can thin out the gel.
- Cool uncovered: Let the jars cool on the counter uncovered until room temperature before sealing to avoid condensation inside the lid.
Flavor Variations (OPTIONAL)
- Spicy version: Add 1–2 teaspoons red pepper flakes or a diced small hot pepper to the blender for a spicy kick.
- Citrus lift: Stir in 1 teaspoon orange zest after cooking for bright, citrusy notes.
- Ginger infusion: Add 1 tablespoon freshly grated ginger to the saucepan for a warm, spicy undertone.
- Herb-scented: Fold in 1 teaspoon finely chopped fresh basil or thyme just before jarting for an herby twist.
- Lighter-sweet version: Reduce sugar by 1/4 cup and use a tested low-sugar pectin (optional — may change texture).
Serving Suggestions
- Cheese board: Spoon over cream cheese or spread on crackers alongside aged cheddar for a classic combo.
- Glaze for proteins: Brush on grilled chicken, roasted turkey, or baked fish in the last few minutes of cooking for a glossy finish.
- Sandwich spread: Use as a sweet-savory spread on turkey or grilled cheese sandwiches.
- Biscuits and brunch: Serve warm biscuits with a dollop of red pepper jelly and butter for brunch.
- Rice accompaniment: This jelly also brightens grain bowls — try it with a simple rice dish like this comforting 4-ingredient homemade white gravy over rice for a quick weekend meal.
- Party appetizer: Mix a spoonful with cream cheese for an easy, crowd-pleasing dip.
Make-Ahead, Storage & Reheating
- Make-ahead: You can make the jelly up to two weeks in advance and keep it refrigerated until serving.
- Refrigeration: Store sealed jars in the refrigerator. The jelly will thicken more as it chills.
- Reheating: If you prefer a pourable glaze, gently warm small amounts in a saucepan over low heat or microwave in short bursts, stirring between intervals until fluid — do not return heated jelly to previously opened jars for storage.
- Texture changes: The jelly will be firmer when cold and loosens when warmed; this is normal.
Storage and Freezing Instructions
- Refrigerator: Stored in sterilized, sealed jars, the jelly should keep in the refrigerator for up to 3–4 weeks.
- Freezing: Freezing is not recommended for the best texture because pectin-based jellies can change consistency after thawing. If you must freeze, transfer to freezer-safe containers leaving headspace and plan to use within 3 months; expect a slightly grainier texture after thaw.
- Alternative to freezing: For longer storage, consider processing sealed jars in a boiling water bath according to safe canning guidelines (note: this recipe’s original directions only call for refrigeration — follow canning resources if you want shelf-stable jars).
Nutrition Facts (Per Serving)
| Calories | Protein | Carbs | Fat | Fiber | Sodium |
|———|——–|——|—–|——|——-|
| 55 kcal | 0.4 g | 14 g | 0 g | 0.5 g | 120 mg |
Nutrition values are estimates and may vary depending on ingredients and portion sizes.
FAQ About Homemade Red Pepper Jelly
Q: Why didn’t my jelly set?
A: The most common reasons are incorrect pectin-to-sugar ratios, insufficient boiling after adding pectin, or using a non-pectin sugar substitute. Make sure you used the powdered fruit pectin and boiled for the recommended 1–2 minutes after adding it.
Q: Can I use jarred roasted red peppers instead of fresh?
A: You can, but drain them well before blending. Keep in mind jarred peppers may add additional liquid, which can affect the texture and set.
Q: How long will this keep in the fridge?
A: When stored in sterilized jars and sealed, it should keep 3–4 weeks refrigerated.
Q: Can I reduce the sugar?
A: Slight reductions are possible, but sugar aids in the gelling process with pectin. For larger reductions, use a pectin designed for low-sugar recipes and follow its instructions.
Q: Is there a way to test doneness without chilling?
A: A quick test is to spoon a small amount onto a cold plate and tilt it; if it thickens and doesn’t run quickly, it’s close. Chilling is the most reliable indicator.
Q: Can I can this recipe for pantry storage?
A: The directions provided call for refrigeration only. If you want shelf-stable jars, follow a trusted water-bath canning procedure and canning-specific recipes to ensure safety.
Notes
- Presentation tip: Pour the jelly into clear jars to show off that beautiful red color and label them for gifts.
- Flavor boost: A tiny pinch of salt and fresh lemon juice brightens the entire batch — don’t skip the lemon juice.
- Texture tweak: For a chunkier jelly, pulse the peppers briefly instead of pureeing completely (optional variation).
- Season to taste: After cooking, taste a small spoonful (when warm) and adjust with a touch more lemon juice or a pinch of salt if needed.
- Serve warm: For a lovely glaze, warm a small amount and brush onto cooked proteins during the last minute of cooking.
- Safety note: This recipe follows a refrigerator-preserve method. If you intend to shelf-stable can, use approved canning guidelines and modify processing times accordingly.
Homemade Red Pepper Jelly
Ingredients
For the Jelly
- 1 pound red bell peppers, chopped (about 2–3 medium peppers)
- 1 cup sugar Granulated sugar is preferred for gelling.
- 1 cup apple cider vinegar Other vinegars can be used, but flavor may vary.
- 1/2 cup water
- 1 tablespoon lemon juice Fresh lemon juice recommended.
- 1 package (1.75 oz) fruit pectin (powdered)
- 1/4 teaspoon salt Optional for a low-sodium version.
Instructions
Preparation
- Place the chopped red bell peppers in a blender or food processor and puree until completely smooth.
- In a large saucepan, combine the pureed peppers, sugar, apple cider vinegar, water, and lemon juice.
- Bring the mixture to a boil over medium heat, stirring constantly to dissolve the sugar.
- Once boiling, stir in the fruit pectin and 1/4 teaspoon salt until fully incorporated.
- Continue to cook for 1–2 minutes, stirring constantly, until the mixture thickens.
- Remove from heat and pour the hot jelly into sterilized jars.
- Allow jars to cool to room temperature before sealing and refrigerating.