
Indulge in a Gluten-Free Delight
If you’re in search of a dessert that will tantalize your taste buds and satisfy your sweet cravings, look no further. This ultra-thick and creamy gluten-free Oreo dessert is not just any sweet treat; it’s the epitome of indulgence. Perfect for gatherings, celebrations, or simply a cozy night in, this dessert doesn’t compromise on flavor while ensuring a delightful gluten-free experience. With every bite, you’ll be transported to chocolate paradise, so grab your apron, and let’s get started!
Why You’ll Love This Dish
What makes this gluten-free Oreo dessert truly special? For starters, it’s a crowd-pleaser! Its rich chocolatey goodness combined with the creamy texture is a surefire way to impress your friends and family, even those who don’t follow a gluten-free diet. Plus, it’s surprisingly easy to prepare and budget-friendly, making it a great go-to for last-minute gatherings or weeknight treats.
"This gluten-free Oreo dessert is a game-changer! It’s the perfect combination of creamy and crunchy. My family couldn’t believe it was gluten-free!" – Satisfied Baker
Whether you’re celebrating a birthday, hosting a dinner party, or just rewarding yourself at the end of a long week, this dessert hits all the right notes.
Step-by-Step Overview
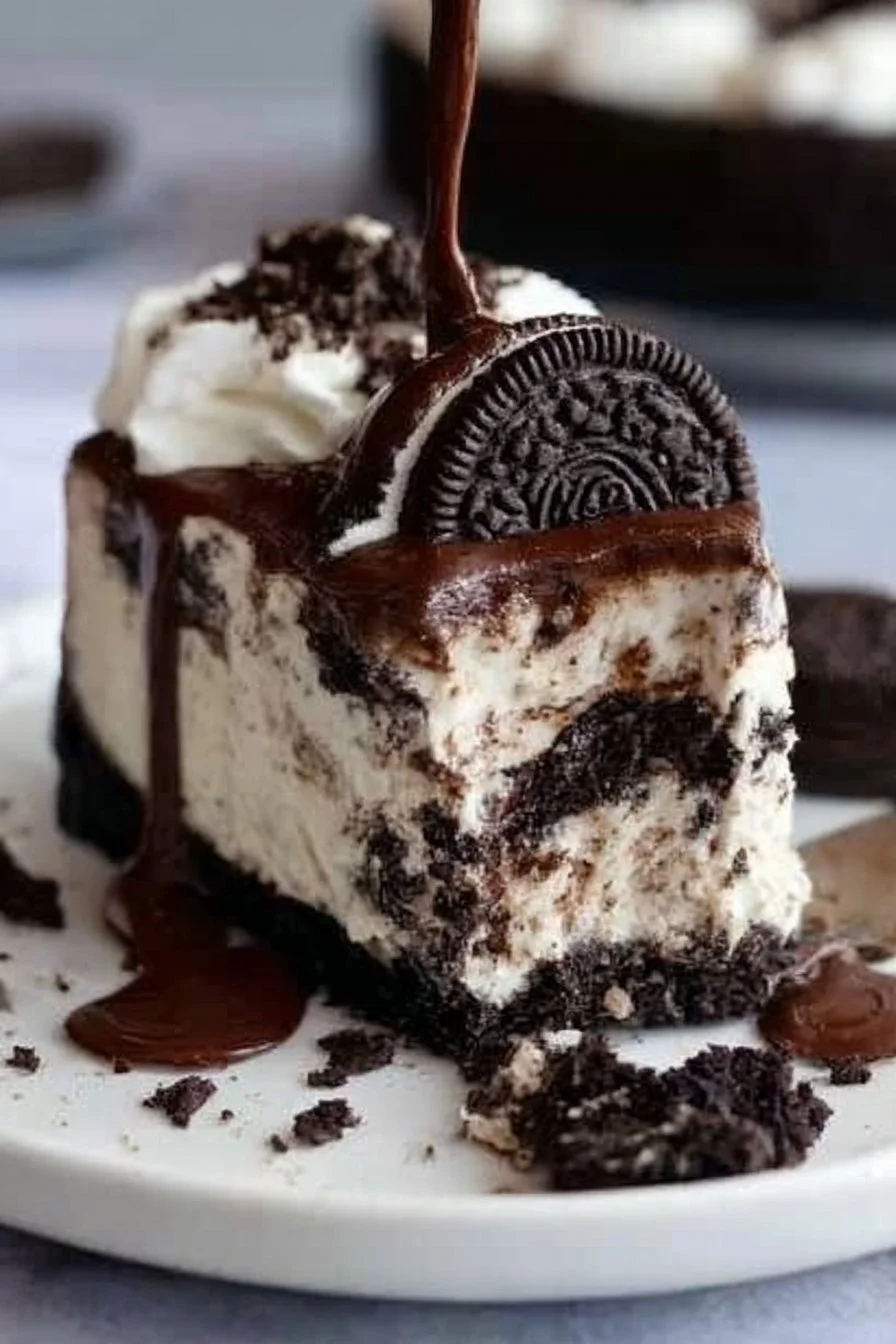
Creating this ultimate gluten-free Oreo dessert is a breeze, even for novice bakers. You’ll start by preparing a luscious base that’s both rich and satisfying, followed by layering it with crushed Oreos and a fluffy cream filling. Finally, everything will come together in a fantastic presentation, perfect for sharing. Get ready to please your palate with this simple yet impressive dish!
What You’ll Need
Gathering the right ingredients is crucial for achieving that perfect dessert. Here’s what you’ll need:
- Gluten-free Oreo cookies: The star of the show, ensure you choose a certified gluten-free brand to keep it safe for all.
- Cream cheese: Softened, for that creamy filling.
- Heavy whipping cream: This will provide the luscious texture.
- Powdered sugar: To sweeten up the filling and keep it airy.
- Vanilla extract: A splash of vanilla enhances the richness.
- Chocolate sauce: For drizzling (optional, but highly recommended!).
You can easily substitute dairy cream with coconut cream or use a plant-based cream cheese for a dairy-free alternative.
Directions to Follow
Now that you have your ingredients ready, let’s get to the fun part—making the dessert! Follow these simple steps:
- Prepare the base: Start by crushing the gluten-free Oreo cookies into fine crumbs. Mix with melted butter until you reach a wet sand-like consistency. Press this mixture firmly into the bottom of a serving dish.
- Make the filling: In a bowl, combine softened cream cheese and powdered sugar, blending until smooth. Gradually mix in whipped cream until fluffy. Add vanilla extract and fold well.
- Layer it up: Spread half of the cream cheese mixture over the Oreo crust. Sprinkle crushed Oreos on top, then layer with the remaining cream filling.
- Chill: Cover your dessert and refrigerate for at least four hours, allowing it to set.
- Serve: Before serving, top with chocolate sauce and additional crushed Oreos for that extra flair!
Best Ways to Enjoy It
This gluten-free Oreo dessert is versatile when it comes to serving. You can slice it into squares, arrange it in individual dessert cups, or even serve it in jars for a fun spin! Pair it with fresh berries or a dollop of whipped cream for a delightful contrast. It’s also perfect alongside a scoop of vanilla ice cream for those extra special occasions!
Storage and Reheating Tips
Since this dessert has cream cheese and whipped cream, it’s best kept refrigerated. You can easily store leftovers in an airtight container for up to three days. If you decide to freeze it, be sure to wrap it well to avoid freezer burn. When you’re ready to enjoy it again, let it thaw in the refrigerator overnight but note that the texture might alter slightly.
Pro Chef Tips
For an even more decadent version, consider adding a layer of chocolate pudding between the cream filling and the Oreo crumbs. This little trick enhances the richness and elevates the flavor profile. Always taste your filling before layering; you can adjust the sweetness according to your preference.
Creative Twists
While this dessert is stunning on its own, there are plenty of ways to customize it. Think about changing the flavor by using different types of gluten-free sandwich cookies—mint or peanut butter versions could create an exciting twist. You could also add toppings like crushed nuts, fruit, or caramel for added texture and flavor.
Common Questions
How long does this dessert take to prepare from start to finish?
It takes about 30 minutes to prepare, but don’t forget the chilling time of at least 4 hours!Can I use regular Oreos instead of gluten-free?
For those without gluten intolerances, traditional Oreos work perfectly, but make sure to follow proper dietary considerations.Can I make this dessert dairy-free?
Absolutely! Substitute the cream cheese with a dairy-free option, and use coconut cream in place of heavy whipping cream.
Adding delicious treats to your gluten-free repertoire has never been easier. So, why not give this delightful dessert a try, and see how it brightens any occasion? And if you’re looking for more tasty gluten-free ideas, check out these crispy gluten-free chicken taquitos for a satisfying meal!