
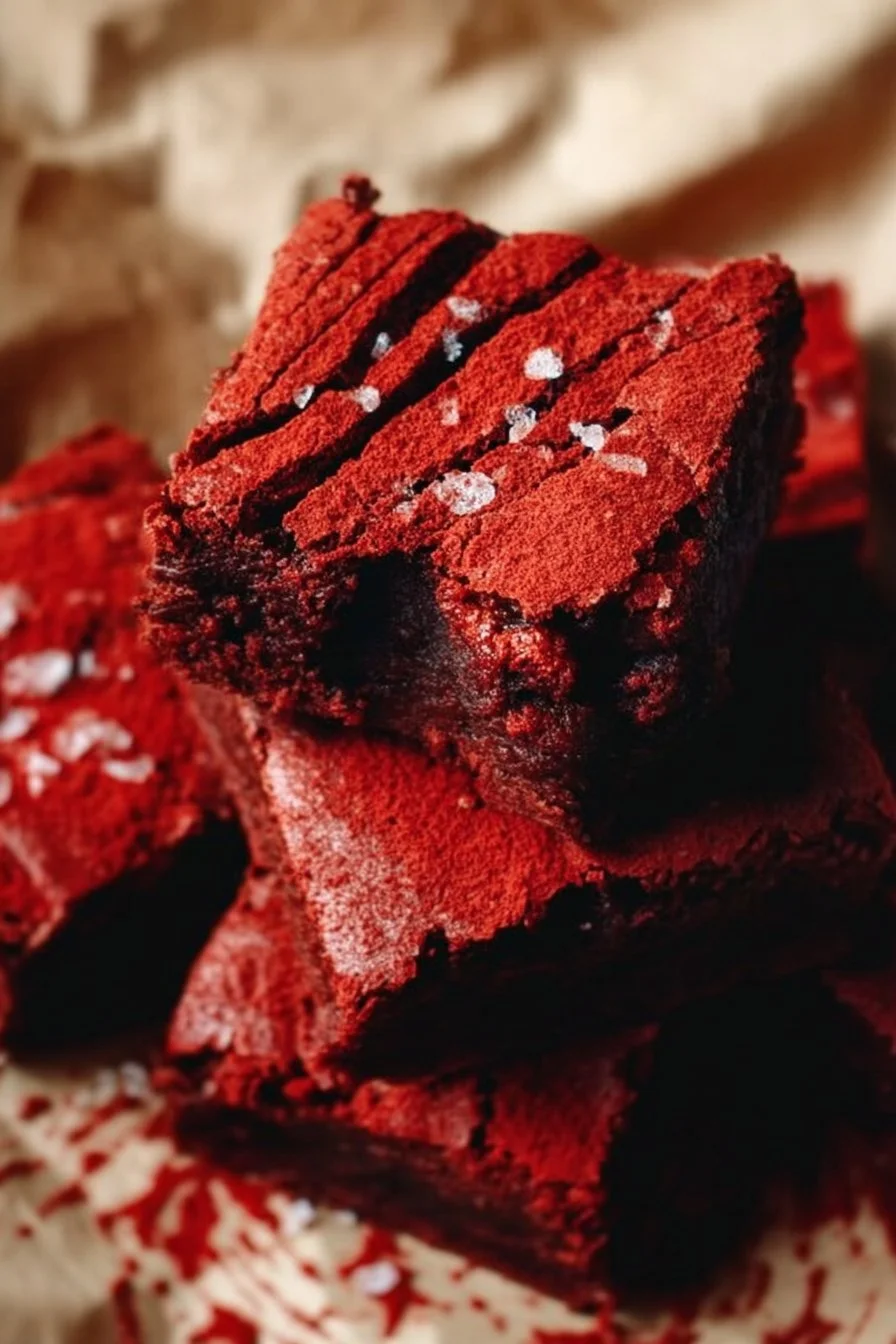
Indulge in Red Velvet Brownies
Making homemade Red Velvet Brownies is an experience that brightens up any kitchen. These delightful treats, with their rich, fudgy texture and signature crimson hue, are a stunning dessert that elevates everything from cozy family dinners to festive gatherings. The luxurious addition of chocolate chips makes these brownies unforgettable, while optional cream cheese frosting takes them to another level of deliciousness. Trust me; once you bake a batch, you’ll find yourself making them again and again!
Why You’ll Love This Dish
So, why should you make Red Velvet Brownies? For starters, they combine the classic allure of red velvet with the comforting texture of brownies. They’re perfect for any occasion, whether it’s a simple weeknight pick-me-up or a special event such as Valentine’s Day or a birthday. Plus, they’re quick to whip up and only require a handful of basic ingredients, making them a budget-friendly treat that everyone will devour.
“These Red Velvet Brownies have become a staple at my holiday gatherings. Everyone raves about them!” – Sarah, a satisfied home baker.
What’s more, they’re a fabulous way to impress your friends and family without spending hours in the kitchen. If you love unique desserts that stand out, this one definitely needs a spot in your rotation.
How This Recipe Comes Together
Red Velvet Brownies are not only delicious but are quite straightforward to make. Here’s a brief overview: You’ll start by mixing your wet ingredients, then combine them with the dry ingredients, and finally fold in those decadent chocolate chips. Bake, cool, and voilà! You’ve got a spectacular dessert on your hands. Let’s break it down.
Gather These Items
Before you start baking, ensure you have all the essential ingredients handy:
- 1 cup all-purpose flour
- 1/2 cup cocoa powder
- 1 cup sugar
- 1/2 cup unsalted butter, melted
- 2 large eggs
- 1 tablespoon red food coloring
- 1 teaspoon vanilla extract
- 1/2 teaspoon baking powder
- 1/4 teaspoon salt
- 1 cup chocolate chips
Feel free to substitute gluten-free flour or alternative sugars if you have dietary restrictions. With just a few changes, you can still enjoy these delightful brownies!
Step-by-Step Instructions
Now, let’s dive into the preparation of these decadent brownies:
- Preheat your oven to 350°F (175°C) and grease a 9×9 inch baking dish.
- In a large mixing bowl, combine melted butter with sugar, eggs, and vanilla extract. Stir in the red food coloring to achieve that signature vibrant hue.
- In a separate bowl, whisk together flour, cocoa powder, baking powder, and salt.
- Gradually add the dry mixture into the wet ingredients, mixing until just combined. Be careful not to over-mix!
- Fold in the chocolate chips for that rich, melty goodness.
- Pour the batter into your prepared baking dish, spreading it evenly.
- Bake for 20-25 minutes or until a toothpick inserted into the center comes out clean.
- Allow cooling before topping with cream cheese frosting if desired.
How to Plate and Pair
These Red Velvet Brownies can be served in a variety of delightful ways. For an elegant touch, dust them with cocoa powder or powdered sugar, and add a dollop of whipped cream next to each slice. Pair them with a scoop of vanilla or cream cheese ice cream for a decadent dessert that’s perfect for sharing. Consider serving them alongside a glass of cold milk or hot coffee for a delightful balance.
Storage and Reheating Tips
These brownies are best enjoyed fresh, but if you have leftovers (a rarity, if I do say so), store them in an airtight container. They’ll stay delicious at room temperature for about 3 days or in the fridge for up to a week. If you’d like to keep them longer, consider freezing them. Just wrap them tightly in plastic wrap before placing them in a freezer-safe container. When you’re ready to enjoy them again, simply thaw them at room temperature, or pop them in the microwave for a few seconds.
Helpful Cooking Tips
To achieve the best results, make sure your butter is melted but not hot before mixing it in with the other ingredients. This maintains the perfect brownie texture. Additionally, using high-quality cocoa powder will enhance the flavor significantly. Don’t skip the step of folding in the chocolate chips; this ensures they’re distributed evenly throughout the batter, making every bite delightful!
Creative Twists
If you’re feeling experimental, consider adding different flavor variations to your Red Velvet Brownies. Swapping out the chocolate chips for white chocolate or adding nuts like pecans or walnuts can create exciting new layers of flavor. For a twist on the cream cheese frosting, try infusing it with berry purée for a refreshing touch that complements the brownies beautifully.
Your Questions Answered
How long do these brownies take to prepare?
The total time from preparation to baking is roughly 35-45 minutes.
Can I use egg substitutes in this recipe?
Yes, you can use flax eggs or applesauce as a substitute if you’re looking for a vegan option.
What’s the shelf-life of Red Velvet Brownies?
Stored properly, they can last a week in the fridge or several months in the freezer.
If you’re in the mood for another delightful brownie treat, check out these chocolate-covered strawberry brownies that are sure to satisfy your sweet tooth!