

Making soup in school doesn’t have to be complicated or time-consuming! Whether you’re looking for a quick, satisfying lunch or a cozy snack to fuel your day, this simple soup recipe is perfect for busy students and anyone on the go. With easy-to-find ingredients and step-by-step instructions, you can create a warm, flavorful meal in no time. Plus, it’s versatile enough to customize with your favorite veggies or seasonings—perfect for meal prep or enjoying right away. If you’re craving a tasty, no-fuss solution for your school day, this recipe is your new go-to! Ready to get started? Let’s dive into how to make this delicious, student-friendly soup that’s sure to please.
Why You’ll Love soup in school
This soup is everything you need for a quick, delicious, and satisfying meal during your school day.

Here’s why it stands out:
- Fast and Easy: No need to spend hours in the kitchen. This recipe is designed to be simple and straightforward, so even the busiest days won’t keep you from enjoying a homemade meal. Whether you’re rushing between classes or preparing for a long study session, this soup can be made in just a few minutes.
- Student-Friendly: We know school days can be hectic, but this soup is the perfect solution for a filling lunch. It’s made with pantry staples and healthy ingredients, so you can easily whip it up without a trip to the store. Plus, it’s budget-friendly—ideal for student meal prepping!
- Comforting and Satisfying: There’s something incredibly comforting about a warm bowl of soup. It’s the perfect way to take a break, unwind, and recharge during a busy day. Plus, it’s naturally filling, giving you the energy you need to tackle your schoolwork without feeling sluggish.
- Customizable: One of the best things about this recipe is how easily it can be adjusted to fit your personal taste. Whether you prefer different veggies, seasonings, or add-ins, this soup can be made to suit your cravings and dietary needs.
- Perfect for Meal Prep: Make a big batch ahead of time, and you’ll have lunch ready to go for the whole week. Simply store leftovers in the fridge or freezer for a quick, hearty meal anytime. It’s the ultimate time-saver for busy days at school.
So, if you’re craving a hearty yet simple dish that will keep you energized and satisfied throughout the day, this is the soup for you! It’s the perfect combination of convenience, taste, and nutrition—all in one bowl. Ready to get cooking? Let’s dive into the ingredients!
Ingredients of soup in school
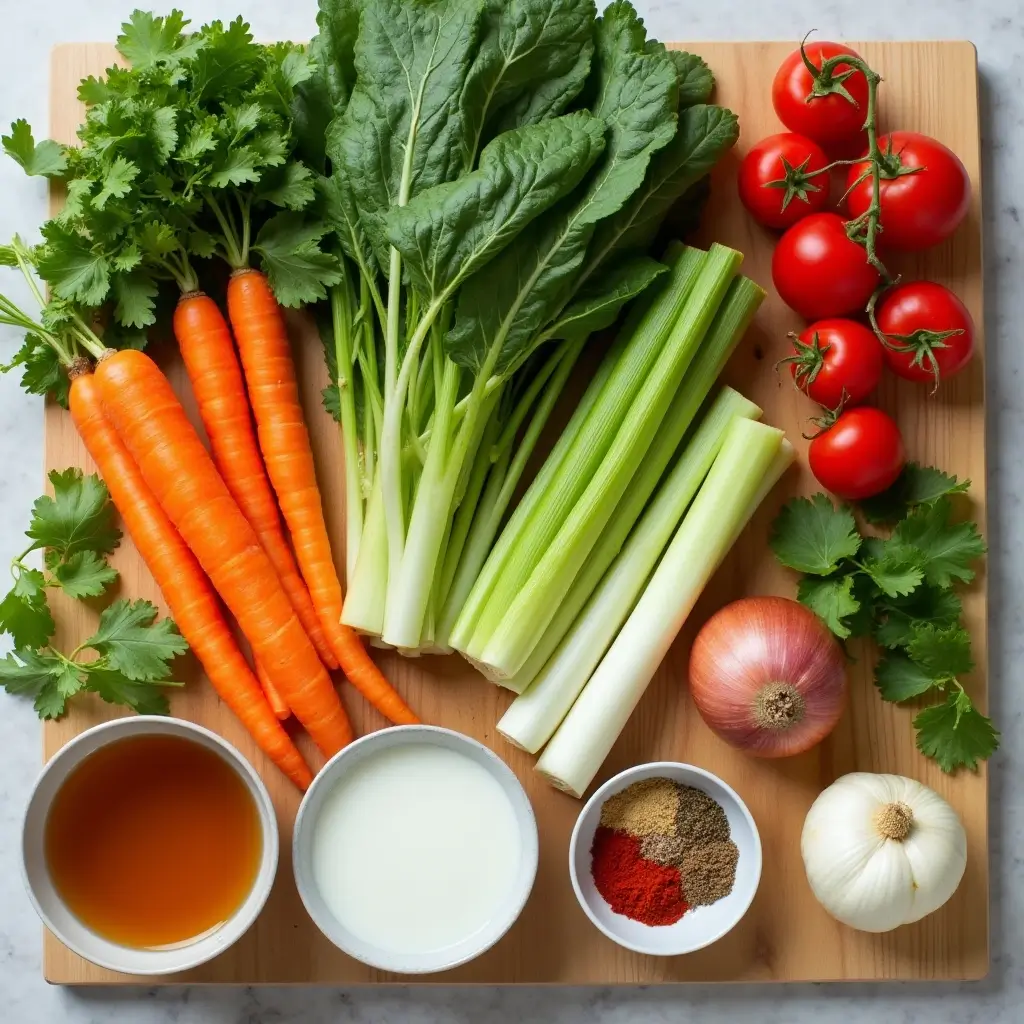
To make this quick and delicious soup, you’ll need just a few basic ingredients—most of which you likely already have in your pantry. Here’s what you’ll need to gather:
- 1 tablespoon olive oil
- 1 medium onion, chopped
- 2 cloves garlic, minced
- 2 cups vegetable broth (or chicken broth for extra flavor)
- 1 can (14.5 oz) diced tomatoes
- 1 cup frozen mixed vegetables (or fresh vegetables of your choice, like carrots, peas, or corn)
- 1/2 cup pasta (small shapes like elbow macaroni or shells work best)
- 1 teaspoon dried oregano
- 1/2 teaspoon salt
- 1/4 teaspoon black pepper
- Optional: 1/2 cup cooked chicken or beans for extra protein
- Fresh herbs (like basil or parsley) for garnish
Tips for Success:
- Use what you have: Feel free to customize this recipe based on the veggies or ingredients you have on hand. You can swap out the mixed vegetables for spinach, zucchini, or any other veggies you prefer.
- Broth options: While vegetable broth is a great vegetarian choice, you can use chicken broth if you prefer a richer flavor. If you need a low-sodium option, make sure to check the label.
- Pasta choice: Small pasta shapes work best because they cook quickly and fit perfectly in a soup. But if you prefer another kind of pasta, feel free to use it—just adjust the cooking time accordingly.
- Add protein: To make this soup even heartier, consider adding cooked chicken, beans, or lentils. These ingredients can make it a more filling meal, perfect for those longer school days.
These simple, healthy ingredients come together to make a flavorful, satisfying soup that’s perfect for school lunches, after-school snacks, or even a quick dinner. Ready to start cooking? Let’s move on to the next step: the instructions!
Instructions of soup in school
Now that you’ve got all your ingredients ready, it’s time to start cooking! Don’t worry—this step-by-step guide will ensure your soup turns out perfectly every time.

- Sauté the Aromatics
In a large pot, heat the olive oil over medium heat. Add the chopped onion and sauté for about 3-4 minutes, or until the onion becomes soft and translucent. This step helps build the foundation of flavor. Add the minced garlic and cook for another 30 seconds, just until fragrant. - Add the Broth and Tomatoes
Pour in the vegetable broth (or chicken broth for extra flavor) and add the diced tomatoes along with their juices. Stir everything together, then bring it to a gentle simmer. Let it cook for 5-7 minutes so all the flavors begin to meld together. - Add the Veggies and Pasta
Stir in the frozen mixed vegetables (or any other veggies you like) and the pasta. Let the soup simmer for about 10-12 minutes, or until the pasta is tender and the vegetables are heated through. If you’re adding any protein like chicken or beans, now’s the time to stir it in as well. - Season to Taste
Once everything is cooked, it’s time to season. Add the dried oregano, salt, and black pepper. Taste and adjust the seasoning as needed. If you like your soup with a little extra zing, feel free to add a dash of red pepper flakes or a squeeze of lemon. - Serve and Garnish
Ladle the soup into bowls and garnish with some fresh herbs like basil or parsley. If you want an extra touch, sprinkle on some grated cheese or serve with a slice of warm bread on the side.
Tips for Success:soup in school
- Stir occasionally: Make sure to stir the soup every few minutes while it’s simmering to keep the pasta from sticking to the bottom of the pot.
- Check the pasta: Since pasta can cook at different rates, keep an eye on it. You may need to adjust the cooking time based on the type of pasta you use.
- Make it creamy: For a creamier version of this soup, you can add a splash of milk or cream just before serving.
Now, you have a hearty, flavorful soup that’s ready to enjoy! Whether you’re eating it right away or saving it for later, this recipe is a perfect balance of convenience and taste. Ready to dive into the next step? Let’s talk about how to make this soup even more delicious with pro tips and variations!
Pro Tips and Variations
Now that you’ve got the basics down, let’s make this soup even better! Here are some pro tips and variations to elevate the flavor, customize the dish to your liking, and get creative in the kitchen.
Pro Tips:
- Add Flavor Boosters: For an extra depth of flavor, try adding a bay leaf or a splash of balsamic vinegar while the soup is simmering. These ingredients bring richness and complexity without much effort.
- Use Homemade Broth: If you have the time, homemade vegetable or chicken broth will take this soup to the next level. It’s packed with natural flavors and can be a great way to use up leftover vegetables or meat scraps.
- Control the Consistency: If you prefer a thicker soup, use a hand blender to puree part of the soup, leaving some chunks for texture. This will give you a creamy consistency without needing any dairy.
- Sauté Your Veggies First: For an even richer flavor, try sautéing your vegetables (like carrots, celery, or zucchini) in the olive oil with the onions. This caramelizes the veggies and enhances the overall taste of the soup.
- Store for Later: This soup stores wonderfully! If you’re making it in advance, let it cool to room temperature before transferring to an airtight container. It will keep in the fridge for 3-4 days or can be frozen for up to 3 months.
Variations to Try:
- Spicy Soup: If you love a bit of heat, add some red pepper flakes, a diced jalapeño, or even a dash of hot sauce to spice things up. The heat pairs perfectly with the savory broth and hearty veggies.
- Vegetarian or Vegan: This soup is easily adaptable for a plant-based diet. Simply omit any animal-based ingredients (like chicken or broth) and use vegetable broth instead. You can also add extra beans or tofu for protein.
- Protein-Packed: Want a protein boost? Try adding some cooked chicken, turkey, or even ground meat. If you’re looking for a vegetarian protein source, beans, lentils, or chickpeas work wonderfully.
- Cheesy Twist: Stir in some grated cheese, like cheddar or parmesan, at the end for a creamy, cheesy finish. You can also sprinkle extra cheese on top before serving for a gooey, indulgent topping.
- Pasta-Free Option: If you’re looking for a low-carb alternative, skip the pasta and add cauliflower rice or zucchini noodles instead. These swaps provide a similar texture without the carbs.
The beauty of this soup is how flexible it is—whether you’re feeding a crowd, making a quick lunch for yourself, or looking to clear out your fridge, there’s no wrong way to make it. These tips and variations will help you tailor it to your taste and dietary preferences. Get creative, have fun with the recipe, and enjoy the process!
Now that you’ve got all the tips and tricks, let’s move on to the next step: how to serve your delicious creation!
How to Serve soup in school
Once your soup is cooked to perfection, it’s time to serve it up! Here are some easy and creative ways to enjoy your delicious creation:

Serving Suggestions:
- Garnish with Fresh Herbs: Add a sprinkle of fresh herbs like basil, parsley, or oregano to give your soup a burst of color and a fresh, vibrant flavor. Herbs not only enhance the taste but also make your dish look more appealing.
- Pair with Crusty Bread: A warm bowl of soup is always better with a slice of crusty bread on the side. Whether you prefer sourdough, a baguette, or a hearty whole-grain loaf, bread is perfect for soaking up every last drop of soup.
- Top with Cheese: A little cheese goes a long way! Add a handful of grated parmesan, cheddar, or even a spoonful of cream cheese for a rich, creamy finish. For an extra indulgent touch, you can melt the cheese directly into the soup before serving.
- Serve with a Side Salad: If you’re looking to balance out your meal, serve your soup with a simple side salad. A light green salad with a tangy vinaigrette complements the hearty soup without overwhelming the flavors.
- Make It a Full Meal: For a heartier option, add some protein-rich toppings like a scoop of cooked chicken, beans, or tofu. This will turn your soup into a more filling and satisfying meal.
Serving Tips:
- Adjust Temperature: If you’re serving this soup to a group, you can keep it warm in a slow cooker or on a low simmer until it’s ready to serve. Just be sure to stir occasionally to prevent it from sticking to the pot.
- Create Soup Bowls: For a fun twist, serve the soup in large bread bowls. Hollow out the center of a round loaf and ladle the soup inside—it makes for an impressive and interactive presentation!
Perfect for Meal Prep:
This soup is ideal for meal prep. After making a large batch, divide the soup into individual portions and store them in airtight containers. The soup will keep in the fridge for 3-4 days or can be frozen for up to 3 months. When you’re ready to eat, just reheat and enjoy!
With these simple serving suggestions, you’ll be able to turn your soup into a satisfying and delicious meal every time. Now that you’ve got the serving ideas down, it’s time to wrap up with a few final thoughts in the conclusion!
Conclusion
There you have it—your easy, quick, and delicious school soup is ready to enjoy! This recipe is perfect for busy students who want a nutritious, satisfying meal without spending too much time in the kitchen. Whether you’re grabbing a bowl between classes or enjoying it as an after-school snack, this soup is the ultimate comfort food that packs a punch of flavor and nourishment.
Here’s a quick recap of why this soup will become your go-to:
- Fast and Simple: You don’t need a lot of time or ingredients to make this soup, which means you can focus more on your schoolwork and less on cooking.
- Customizable: Add your favorite veggies, proteins, or seasonings to make it your own. There’s no limit to how you can tweak this recipe to suit your tastes.
- Great for Meal Prep: Make a large batch, and you’ve got lunch or dinner ready for the week. It’s an easy way to stay fueled, even when your schedule is packed.
- Healthy and Filling: With a balance of vegetables, protein, and carbs, this soup will keep you satisfied and energized throughout the day.
Whether you serve it with a side of bread, top it with cheese, or enjoy it on its own, you’ll love how versatile and comforting this soup is. We hope this recipe becomes a staple in your school routine. Happy cooking, and don’t forget to share your creations with friends and family—they’ll thank you for it!
Ready to try your hand at more simple and delicious recipes? Check out our other posts for even more creative ideas to make your meals just as tasty and easy!

how to make soup in school
Ingredients
- 1 tablespoon olive oil
- 1 medium onion chopped
- 2 cloves garlic minced
- 2 cups vegetable broth or chicken broth for extra flavor
- 1 can 14.5 oz diced tomatoes
- 1 cup frozen mixed vegetables or fresh vegetables of your choice, like carrots, peas, or corn
- 1/2 cup pasta small shapes like elbow macaroni or shells work best
- 1 teaspoon dried oregano
- 1/2 teaspoon salt
- 1/4 teaspoon black pepper
- Optional: 1/2 cup cooked chicken or beans for extra protein
- Fresh herbs like basil or parsley for garnish
Tips for Success:
- Use what you have: Feel free to customize this recipe based on the veggies or ingredients you have on hand. You can swap out the mixed vegetables for spinach zucchini, or any other veggies you prefer.
- Broth options: While vegetable broth is a great vegetarian choice you can use chicken broth if you prefer a richer flavor. If you need a low-sodium option, make sure to check the label.
- Pasta choice: Small pasta shapes work best because they cook quickly and fit perfectly in a soup. But if you prefer another kind of pasta feel free to use it—just adjust the cooking time accordingly.
- Add protein: To make this soup even heartier consider adding cooked chicken, beans, or lentils. These ingredients can make it a more filling meal, perfect for those longer school days.
Instructions
- Sauté the Aromatics
- In a large pot, heat the olive oil over medium heat. Add the chopped onion and sauté for about 3-4 minutes, or until the onion becomes soft and translucent. This step helps build the foundation of flavor. Add the minced garlic and cook for another 30 seconds, just until fragrant.
- Add the Broth and Tomatoes
- Pour in the vegetable broth (or chicken broth for extra flavor) and add the diced tomatoes along with their juices. Stir everything together, then bring it to a gentle simmer. Let it cook for 5-7 minutes so all the flavors begin to meld together.
- Add the Veggies and Pasta
- Stir in the frozen mixed vegetables (or any other veggies you like) and the pasta. Let the soup simmer for about 10-12 minutes, or until the pasta is tender and the vegetables are heated through. If you’re adding any protein like chicken or beans, now’s the time to stir it in as well.
- Season to Taste
- Once everything is cooked, it’s time to season. Add the dried oregano, salt, and black pepper. Taste and adjust the seasoning as needed. If you like your soup with a little extra zing, feel free to add a dash of red pepper flakes or a squeeze of lemon.
- Serve and Garnish
- Ladle the soup into bowls and garnish with some fresh herbs like basil or parsley. If you want an extra touch, sprinkle on some grated cheese or serve with a slice of warm bread on the side.
Tips for Success:soup in school
- Stir occasionally: Make sure to stir the soup every few minutes while it’s simmering to keep the pasta from sticking to the bottom of the pot.
- Check the pasta: Since pasta can cook at different rates, keep an eye on it. You may need to adjust the cooking time based on the type of pasta you use.
- Make it creamy: For a creamier version of this soup, you can add a splash of milk or cream just before serving.
Notes
- Calories: 250 kcal
- Fat: 12g
- Protein: 8g
- Carbs: 30g
- Fiber: 6g
- Sugar: 5g
- Sodium: 350mg
FAQs
Here are some commonly asked questions about making soup, along with helpful answers to guide you through the process!
Making soup is simple and straightforward! Here are the seven basic steps:
Prepare your ingredients (chop vegetables, gather spices, etc.).
Sauté your aromatics (onions, garlic, etc.) to build flavor.
Add liquids (broth, water) and bring to a simmer.
Add vegetables and protein (beans, meat, tofu).
and Add starches (pasta, rice, potatoes, etc.).
Simmer the soup to allow the flavors to blend and ingredients to cook.
Season and garnish before serving.
Bringing soup to school is easy with a few simple tricks:
Use an insulated thermos: These containers keep soup hot for hours, so you can enjoy it at lunchtime.
Preheat your thermos: Before filling it with soup, pour hot water into the thermos and let it sit for a few minutes. This helps maintain the temperature longer.
Pack extra toppings: If you’re adding cheese, croutons, or fresh herbs, keep them in a separate container to add just before eating, keeping them fresh and crunchy.
To prepare soup, follow these simple steps:
Start by sautéing aromatics like onions, garlic, or spices in oil or butter to build the flavor base.
Add liquids (broth, stock, or water) and bring the soup to a simmer.
Add vegetables, protein, and grains (such as pasta or rice).
Let it cook on a low heat to allow the flavors to meld.
Season and adjust flavors before serving.
The soup challenge is a fun cooking challenge where participants are asked to create unique and creative soups based on specific themes or ingredients. It’s a great way to test your cooking skills and experiment with new flavors.