
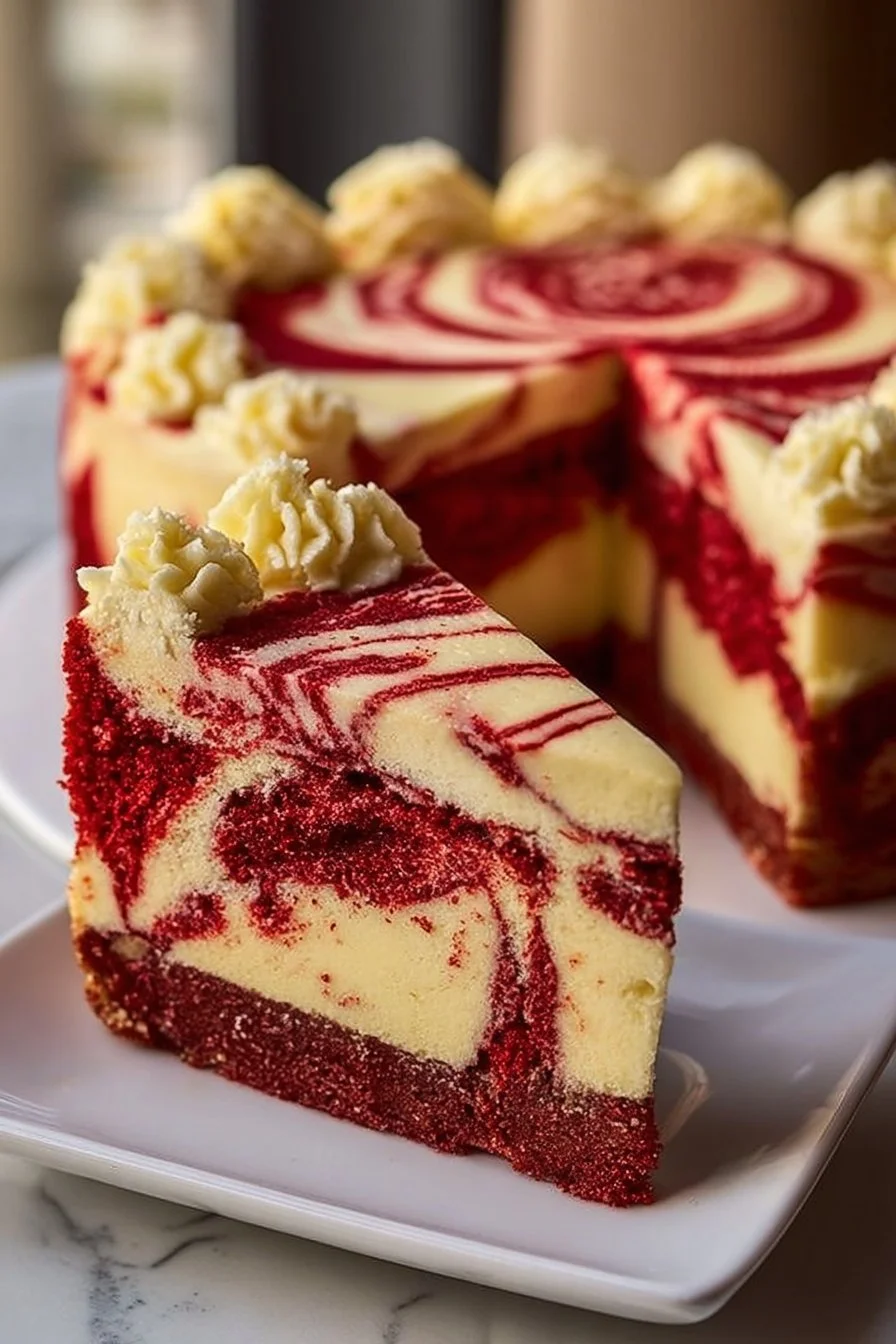
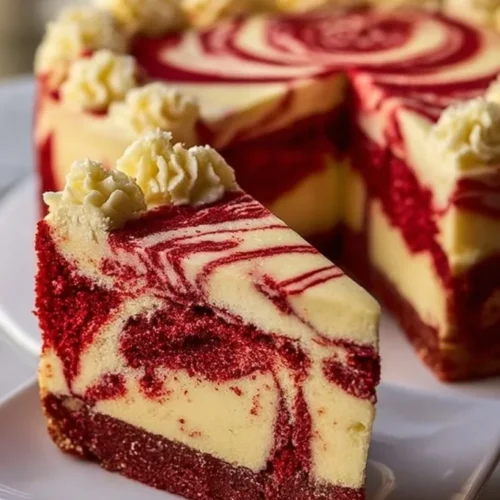
A velvet-red cake marbled with tangy cheesecake — this Red Velvet Cheesecake Swirl Cake is the kind of dessert that looks like you spent hours on it but actually comes together quickly. It’s rich, moist, and slightly tangy from the cream cheese ribbon, making it perfect for birthdays, holiday tables, or an indulgent weekend brunch. If you’re building a brunch spread, it pairs nicely with lighter items — try it with warm, cinnamon-scented pancakes like these Cinnamon Swirl Pancakes for a Sweet Weekend Breakfast for a decadent-but-approachable menu.
Why you’ll love this dish
This cake is a crowd-pleaser for several reasons: it’s showy without being fussy, uses mostly pantry staples, and balances the cocoa-and-buttermilk red velvet base with a creamy cheesecake swirl. It’s also flexible — you can bake it the day before and finish with a quick frosting before serving.
“Brought this to a holiday potluck and it vanished first. Pretty, easy to slice, and the cheesecake swirl keeps every bite interesting.” — a happy tester
Perfect occasions: holiday dessert tables, birthdays, baby showers, Valentine’s Day, or a weekend brunch when you want something special without an all-day bake.
How this recipe comes together
Quick overview of the process so you know what to expect:
- Make a simple red velvet batter (dry ingredients whisked, wet ingredients mixed separately).
- Combine wet and dry until smooth and evenly colored.
- Whip a no-bake cheesecake filling (cream cheese, powdered sugar, vanilla) until light and fluffy.
- Pour cake batter into pans, drop spoonfuls of cheesecake mixture, and use a knife to create attractive swirls.
- Bake until a toothpick comes out with moist crumbs (not raw batter), cool, then frost or serve as-is.
This method gives you a dramatic marbling effect with minimal effort and no separate cheesecake layer to worry about.
What you’ll need
- 2 ½ cups (312 g) all-purpose flour
- 1 ½ cups (300 g) granulated sugar
- 2 tablespoons unsweetened cocoa powder (adds depth and that classic red velvet hint)
- 1 teaspoon baking soda
- ½ teaspoon salt
- 1 cup buttermilk (see notes for a swap)
- 1 cup vegetable oil
- 2 large eggs (room temperature helps emulsify better)
- 1 teaspoon white vinegar
- 1 tablespoon red food coloring (use gel for more vivid color with less liquid)
- 16 ounces (450 g) cream cheese, room temperature
- 1 ½ cups (180 g) powdered sugar
- 2 teaspoons vanilla extract
Notes/substitutions:
- Buttermilk substitute: 1 cup milk + 1 tablespoon lemon juice or white vinegar, rest 5 minutes.
- For a deeper red without as much dye, use a combination of gel food coloring and a teaspoon of beet powder (adds natural color).
- If you need gluten-free, swap in a 1:1 all-purpose gluten-free flour blend and add 1/4 teaspoon xanthan gum if your blend doesn’t contain it.
Step-by-step instructions
- Preheat and prepare pans: Grease and line two 9-inch round cake pans with parchment paper. Preheat the oven to 350°F (175°C).
- Mix dry ingredients: In a large bowl whisk together the flour, granulated sugar, cocoa powder, baking soda, and salt until evenly combined.
- Combine wet ingredients: In another bowl whisk the buttermilk, vegetable oil, eggs, white vinegar, vanilla extract, and red food coloring until smooth and uniform.
- Make the batter: Pour the wet ingredients into the dry and stir gently until the batter is smooth and evenly red. Don’t overmix — stop when there are no lumps.
- Prepare cheesecake filling: In a separate bowl beat the room-temperature cream cheese until smooth with a hand mixer or stand mixer. Add the powdered sugar and vanilla; beat until light and fluffy and no lumps remain. Keep it relatively thick — you want spoonable dollops, not a runny filling.
- Assemble and swirl: Divide the red velvet batter evenly between the two prepared pans. Drop tablespoon-sized spoonfuls of cheesecake mixture over the batter in a random pattern. Use a butter knife or skewer to swirl the cheesecake through the batter—make figure-eights or gentle circles. Avoid over-swizzling; you want distinct ribbons.
- Bake: Bake in the preheated oven for 30–35 minutes. Check doneness by inserting a toothpick into the cake (try not to go through a large cheesecake pocket). It should come out with moist crumbs, not raw batter. If you test a cheesecake pocket, a bit of creamy cheesecake on the toothpick is okay.
- Cool: Let cakes cool in the pans on a wire rack for 10 minutes, then run a knife around edges and invert onto racks to cool completely.
- Finish: Frost with the remaining cheesecake mixture (beat it a bit more to make it spreadable) or use a cream cheese frosting. Decorate with extra swirls, crumbs, or chocolate shavings.
Best ways to enjoy it
- Serve slightly chilled or at cool room temperature; chilling firms the cheesecake ribbons and makes cleaner slices.
- Pair with lightly sweetened whipped cream, fresh raspberries or strawberries, and espresso or lightly roasted coffee to balance the sweetness.
- For a brunch or grazing board, offer this cake alongside savory bites to contrast the richness — a selection that includes cured meats and mild cheeses works well; consider featuring a high-quality salami like the options discussed in this guide to Beef Salami — Discover the Best Uncured All-Natural Flavor.
- For a festive finish, drizzle white chocolate ganache over the top and sprinkle with edible pearls or red velvet crumbs.
Storage and reheating tips
- Refrigerator: Because this cake contains cream cheese, store it covered in the refrigerator. Wrapped tightly or in an airtight container, it will keep 3–4 days.
- Freezing: To freeze, wrap whole cooled layers tightly in plastic wrap and then foil, or freeze individual slices on a tray and transfer to a sealed container. Freeze up to 2 months. Thaw overnight in the refrigerator.
- Reheating: This cake is best served cold or at room temperature. If you prefer warm slices, microwave a single slice for 8–12 seconds at low power — any longer and the cheesecake pockets may become soft and lose structure. Let chilled slices sit 15–20 minutes at room temperature before serving for best texture.
Food safety note: Because cream cheese is perishable, do not leave slices at room temperature for more than 2 hours.
Pro chef tips
- Room temperature ingredients: Bring eggs and cream cheese to room temp for smoother batter and a lump-free cheesecake swirl.
- Use a light hand when swirling: Overmixing the cheesecake into the cake batter will eliminate the marbling effect. Aim for 6–8 gentle swirls per pan.
- Parchment circles: Cut parchment rounds to fit the bottom of the pans; they make release and cleanup effortless.
- Test for doneness away from large cheesecake pockets: If your toothpick hits a cream cheese dollop, you’ll get a misleading wet result. Test in the cake-only area for accuracy.
- Prevent cracks: Don’t overbake. Once the centers are set and a tester shows moist crumbs, remove and cool gently. Rapid cooling can cause cracks; place the pans on a wire rack and avoid drafts.
- Color tip: If you prefer less artificial coloring, use gel food coloring (more concentrated) or reduce the amount and accept a subtler red.
Creative twists
- Chocolate ribbon: Fold in 1/4 cup melted and cooled dark chocolate into part of the batter for chocolate-red contrast.
- Berry swirl: Fold a small amount of raspberry puree into the cheesecake mixture before dolloping for pink marbling and bright fruit flavor.
- Vegan/gluten-free: Use a vegan cream cheese and a flaxseed “egg” plus a gluten-free flour blend. Expect slightly different textures; reduce oven time as needed.
- Layered cheesecake: For a more formal presentation, bake a single red velvet layer first, then top with a full cheesecake layer and bake until set (this becomes a red velvet cheesecake, not a swirl).
- Toppings: White chocolate ganache, toasted pecans, or a dusting of cocoa make elegant finishes.
Common questions
Q: How long does this cake take from start to finish?
A: Active prep time is about 25–35 minutes (mixing and assembling). Bake and cool time add roughly 1–1.5 hours depending on how long you let it cool before frosting. Plan 2 hours total if you want to serve the same day.
Q: Can I make the batter ahead of time?
A: You can prepare the red velvet batter and keep it covered in the refrigerator for up to 24 hours, though baking immediately yields the best rise. Cheesecake filling is fine refrigerated up to 24 hours. Assemble and bake when ready.
Q: My cheesecake pockets sank or spread while baking — what went wrong?
A: If the cheesecake was too soft or runny, it can sink. Make sure the cream cheese is beaten smooth but still stiff — add a bit more powdered sugar if it’s too loose. Also avoid dropping very large dollops; smaller spoonfuls bake more predictably.
Q: Can I use boxed cake mix instead of making the batter from scratch?
A: Yes — a red velvet cake mix can be adapted, but check the package instructions for wet ingredient ratios. You’ll still want to swirl in the homemade cheesecake mixture for the best flavor and texture.
Q: Is this safe to leave out for a party?
A: Because of the cream cheese, limit time at room temperature to 2 hours. For longer events, keep the cake chilled and bring out slices as needed.
If you want other baked-good ideas to round out a menu, consider pancakes or savory additions mentioned earlier for a full spread.
Red Velvet Cheesecake Swirl Cake
Ingredients
For the Cake
- 2.5 cups 2 ½ cups all-purpose flour
- 1.5 cups 1 ½ cups granulated sugar
- 2 tablespoons 2 tablespoons unsweetened cocoa powder For added depth of flavor
- 1 teaspoon 1 teaspoon baking soda
- 0.5 teaspoon ½ teaspoon salt
- 1 cup 1 cup buttermilk Can substitute with milk and lemon juice
- 1 cup 1 cup vegetable oil
- 2 large 2 large eggs Use room temperature for better emulsification
- 1 teaspoon 1 teaspoon white vinegar
- 1 tablespoon 1 tablespoon red food coloring Gel food coloring recommended
For the Cheesecake Swirl
- 16 ounces 16 ounces cream cheese Use room temperature for easy mixing
- 1.5 cups 1 ½ cups powdered sugar
- 2 teaspoons 2 teaspoons vanilla extract
Instructions
Preparation
- Grease and line two 9-inch round cake pans with parchment paper. Preheat the oven to 350°F (175°C).
- In a large bowl, whisk together the flour, granulated sugar, cocoa powder, baking soda, and salt until evenly combined.
- In another bowl, whisk the buttermilk, vegetable oil, eggs, white vinegar, vanilla extract, and red food coloring until smooth and uniform.
- Pour the wet ingredients into the dry ingredients and stir gently until the batter is smooth and evenly red. Do not overmix.
- In a separate bowl, beat the room-temperature cream cheese until smooth. Add the powdered sugar and vanilla; beat until light and fluffy.
Assembling
- Divide the red velvet batter evenly between the prepared pans.
- Drop tablespoon-sized spoonfuls of the cheesecake mixture over the batter in a random pattern.
- Use a knife to swirl the cheesecake through the batter, making gentle circles or figure-eights.
Baking
- Bake in the preheated oven for 30–35 minutes, checking for doneness with a toothpick. It should come out with moist crumbs.
- Let cakes cool in the pans for 10 minutes, then invert onto racks to cool completely.
Finishing
- Frost with the remaining cheesecake mixture or use a cream cheese frosting.
- Decorate with extra swirls, crumbs, or chocolate shavings if desired.