
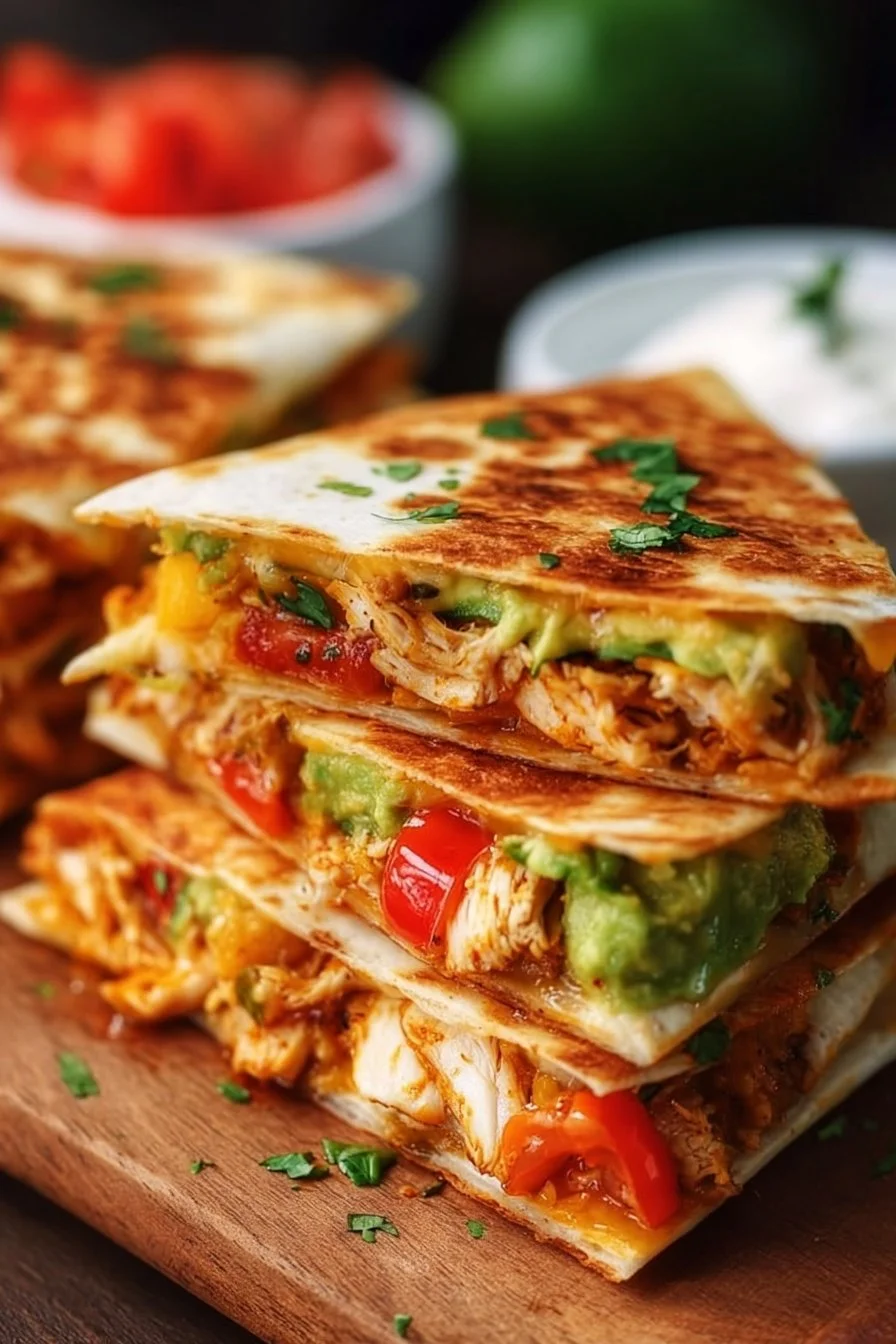
Preheat your oven, because this sheet pan Chicken Fajita Crunchwrap turns busy weeknights into a crispy, crowd-pleasing fiesta. It’s basically the crunchy, shareable cousin of the Tex‑Mex crunchwrap you love—roasted seasoned chicken and peppers, layers of cheese and chips, then baked into one giant, fold-and-seal sheet-pan hero. If you like hands-off, flavor-forward dinners, you might also enjoy Bobby Flay’s chicken thighs recipe for another simple roasted‑chicken weeknight option.
Why you’ll love this dish
This recipe brings three great textures—tender roasted chicken, soft melty cheese, and a satisfying chip crunch—into one easy sheet-pan assembly. It’s perfect for feeding a family, entertaining a casual crowd, or making ahead for game day. You get big fajita flavor with minimal fuss: roast the filling, assemble on the pan, bake, slice, and serve.
“We served this for a family movie night and everyone loved tearing into the crispy slices—easy, fast, and delicious.” — a reader review
Reasons to pick this recipe:
- Time-efficient: two cooking stages (roasting the filling, then baking the assembled crunchwrap).
- Crowd-friendly: serves a group and is easy to slice and share.
- Flexible: swap proteins or toppings to suit picky eaters or dietary needs.
The cooking process explained
Before you dive in, here’s the quick roadmap so you know what to expect:
- Preheat the oven to 400°F (200°C).
- Slice chicken, onions, and bell peppers; toss with taco seasoning and olive oil.
- Roast filling for about 25 minutes until chicken reaches 165°F internally.
- Reduce oven to 350°F (175°C) and assemble the crunchwrap on a buttered pan using overlapping tortillas, cheese, chips, and roasted filling.
- Seal the fold, weigh it, and bake about 30 minutes until golden and crispy.
- Slice and serve with a tangy homemade dip, salsa, guacamole, and fresh tomatoes.
This overview helps you organize timing: while the filling roasts you’ll mix the dip and prep your pan for assembly.
What you’ll need
- 3 boneless chicken breasts, sliced into strips (about 1–1.5 lb total)
- 2 medium onions, sliced into strips
- 4 bell peppers (mix of yellow, red, green, orange), sliced into strips
- 2 tablespoons taco seasoning (or homemade blend)
- 4 tablespoons olive oil
- 9 large flour tortillas
- 1 tablespoon salted butter, melted (to grease the pan)
- 3 cups cheddar cheese, grated
- 3 cups nacho cheese flavored tortilla chips (or your favorite sturdy chip)
- For the dip:
- 1 cup sour cream
- 1/2 cup mayonnaise
- 1–2 tablespoons taco seasoning (adjust to taste)
- 2 tablespoons drained green chilies
- 1 tablespoon honey
- 1 tablespoon lime juice
- 1/2 teaspoon garlic powder
- 1/2 teaspoon salt
- To serve: salsa, guacamole, and fresh chopped tomatoes
Substitutions and notes:
- Swap chicken breasts for thighs if you prefer juicier meat; reduce roasting time slightly.
- For gluten-free, use large GF tortillas and check chips for gluten.
- Lower the sodium by using reduced-salt taco seasoning or homemade spices.
Step-by-step instructions
- Preheat your oven to 400°F (200°C).
- Slice the chicken breasts, onions, and bell peppers into even strips so they cook uniformly.
- In a large bowl toss the sliced chicken and veggies with 2 tablespoons taco seasoning and 4 tablespoons olive oil until evenly coated.
- Spread the mixture in a single layer on a large baking sheet. Roast at 400°F for 25 minutes, or until chicken registers 165°F and vegetables are tender‑charred at the edges.
- Reduce oven temperature to 350°F (175°C). Use tongs to transfer the cooked chicken and veggies to a bowl—do not pour pan juices into the assembly, as excess liquid makes the crunchwrap soggy.
- While the chicken roasts, make the dip: stir together sour cream, mayonnaise, 1–2 tablespoons taco seasoning, green chilies, honey, lime juice, garlic powder, and salt in a small bowl. Refrigerate to meld flavors.
- Spread melted butter over another large baking sheet. Place 1 tortilla in the center and arrange six tortillas around it, overlapping so their edges hang over the pan and cover fully.
- Sprinkle half the grated cheddar cheese over the tortilla base. Layer half of the roasted chicken and veggies on top.
- Scatter all of the nacho chips evenly across the filling for crunch.
- Add the remaining chicken mixture and top with the rest of the grated cheddar cheese.
- Fold the overhanging tortillas toward the center to seal the filling. Place the two remaining tortillas on top to cover any exposed areas.
- Cover the assembled crunchwrap with parchment or wax paper. Place another baking sheet on top and, if needed, weigh it down with a skillet or heavy pan to keep edges sealed.
- Bake at 350°F for 30 minutes, until the outer tortillas are golden and crisp.
- Remove, let rest 5 minutes, then slice into wedges and serve hot with the chilled dip, salsa, guacamole, and fresh chopped tomatoes.
Best ways to enjoy it
Serve the crunchwrap wedges warm so the cheese is melty and the chips stay crisp. Accompaniments:
- Fresh pico de gallo or store-bought salsa verde.
- Creamy guacamole or sliced avocado for richness.
- A light side salad or cilantro-lime rice to round out the meal.
For a themed dinner, pair with Mexican street corn or simple roasted sweet potatoes. If you want another comforting chicken bake for a different night, try the creamy, spicy option in this Cajun cream cheese chicken pasta bake recipe.
Storage and reheating tips
- Refrigeration: Store leftovers in an airtight container or wrap slices in foil. Keep in the fridge up to 3–4 days.
- Freezing: For longer storage, wrap individual slices tightly in plastic and foil, then freeze up to 2 months. Thaw overnight in the fridge before reheating.
- Reheating for crispness: Reheat in a 350°F oven for 10–15 minutes (from refrigerated) or until heated through. A toaster oven or air fryer is ideal to re-crisp the tortilla edges. Microwaving will warm the filling but will soften the crust.
- Food safety: Cook chicken to an internal temperature of 165°F. Discard dips left at room temperature for more than 2 hours.
Pro chef tips
- Even slices equal even cooking: Cut chicken and vegetables into uniform strips so everything finishes at the same time.
- Avoid sogginess: Transfer cooked filling with tongs and leave excess pan juices behind.
- Weigh it down: Pressing the assembled crunchwrap helps the tortillas bond and creates uniform browning.
- Layer thoughtfully: Place chips in the middle layer—not too close to the outer tortillas—to preserve crunch where it counts.
- Cheese trick: Grate your own cheddar for better melting and flavor than pre-shredded options that contain anti-caking agents.
Creative twists
- Vegetarian version: Swap chicken for roasted cauliflower florets and black beans or grilled portobello slices.
- Low-carb: Use large grilled romaine leaves or low-carb tortillas; assemble and warm without baking too long.
- Spicy kick: Add pickled jalapeños or drizzle chipotle hot sauce into the layers.
- International twist: Use pepper jack and cilantro-lime slaw for more Tex‑Mex heat; try cotija cheese for a more authentic Mexican flavor.
Common questions
Q: How long does this take from start to finish?
A: About 70–80 minutes total: 10–15 minutes prep, 25 minutes roasting, then 30 minutes baking after assembly, plus a short rest.
Q: Can I assemble this ahead of time and bake later?
A: You can roast the filling and make the dip a day ahead. Assemble right before baking for the best crispness. If assembled fully, store refrigerated and bake within 24 hours—expect a slightly softer crust.
Q: Will the chips get soggy after baking?
A: The middle-layer chips keep crisp when enclosed between hot cheese and roasted filling; avoiding excess liquid from the filling and transferring with tongs helps maintain crunch.
Q: Can I use shredded rotisserie chicken?
A: Yes—reduce oven times slightly since the chicken is already cooked. Add it after roasting vegetables, or warm gently before layering.
Q: Is this safe to freeze after baking?
A: Yes. Cool completely, wrap tightly, and freeze. Reheat from frozen in a 350°F oven, covered with foil until warmed through, then remove foil to re-crisp.
If you want more sheet-pan dinner ideas or similar crowd-pleasing bakes, these techniques translate well to other recipes and make weeknight dinner planning much easier.
Chicken Fajita Crunchwrap
Ingredients
Filling
- 3 pieces boneless chicken breasts, sliced into strips (about 1–1.5 lb total)
- 2 medium onions, sliced into strips
- 4 pieces bell peppers (mix of yellow, red, green, orange), sliced into strips
- 2 tablespoons taco seasoning (or homemade blend)
- 4 tablespoons olive oil
Assembly
- 9 large flour tortillas
- 1 tablespoon salted butter, melted (to grease the pan)
- 3 cups cheddar cheese, grated
- 3 cups nacho cheese flavored tortilla chips (or your favorite sturdy chip)
Dip
- 1 cup sour cream
- 1/2 cup mayonnaise
- 1–2 tablespoons taco seasoning (adjust to taste)
- 2 tablespoons drained green chilies
- 1 tablespoon honey
- 1 tablespoon lime juice
- 1/2 teaspoon garlic powder
- 1/2 teaspoon salt
Instructions
Preparation
- Preheat your oven to 400°F (200°C).
- Slice the chicken breasts, onions, and bell peppers into even strips so they cook uniformly.
- In a large bowl, toss the sliced chicken and veggies with 2 tablespoons taco seasoning and 4 tablespoons olive oil until evenly coated.
- Spread the mixture in a single layer on a large baking sheet. Roast at 400°F for 25 minutes, or until chicken registers 165°F and vegetables are tender-charred at the edges.
Assembly and Baking
- Reduce oven temperature to 350°F (175°C). Use tongs to transfer the cooked chicken and veggies to a bowl—do not pour pan juices into the assembly, as excess liquid makes the crunchwrap soggy.
- While the chicken roasts, make the dip: stir together sour cream, mayonnaise, 1–2 tablespoons taco seasoning, green chilies, honey, lime juice, garlic powder, and salt in a small bowl. Refrigerate to meld flavors.
- Spread melted butter over another large baking sheet. Place 1 tortilla in the center and arrange six tortillas around it, overlapping so their edges hang over the pan and cover fully.
- Sprinkle half the grated cheddar cheese over the tortilla base. Layer half of the roasted chicken and veggies on top.
- Scatter all of the nacho chips evenly across the filling for crunch.
- Add the remaining chicken mixture and top with the rest of the grated cheddar cheese.
- Fold the overhanging tortillas toward the center to seal the filling. Place the two remaining tortillas on top to cover any exposed areas.
- Cover the assembled crunchwrap with parchment or wax paper. Place another baking sheet on top and, if needed, weigh it down with a skillet or heavy pan to keep edges sealed.
- Bake at 350°F for 30 minutes, until the outer tortillas are golden and crisp.
- Remove, let rest 5 minutes, then slice into wedges and serve hot with the chilled dip, salsa, guacamole, and fresh chopped tomatoes.