
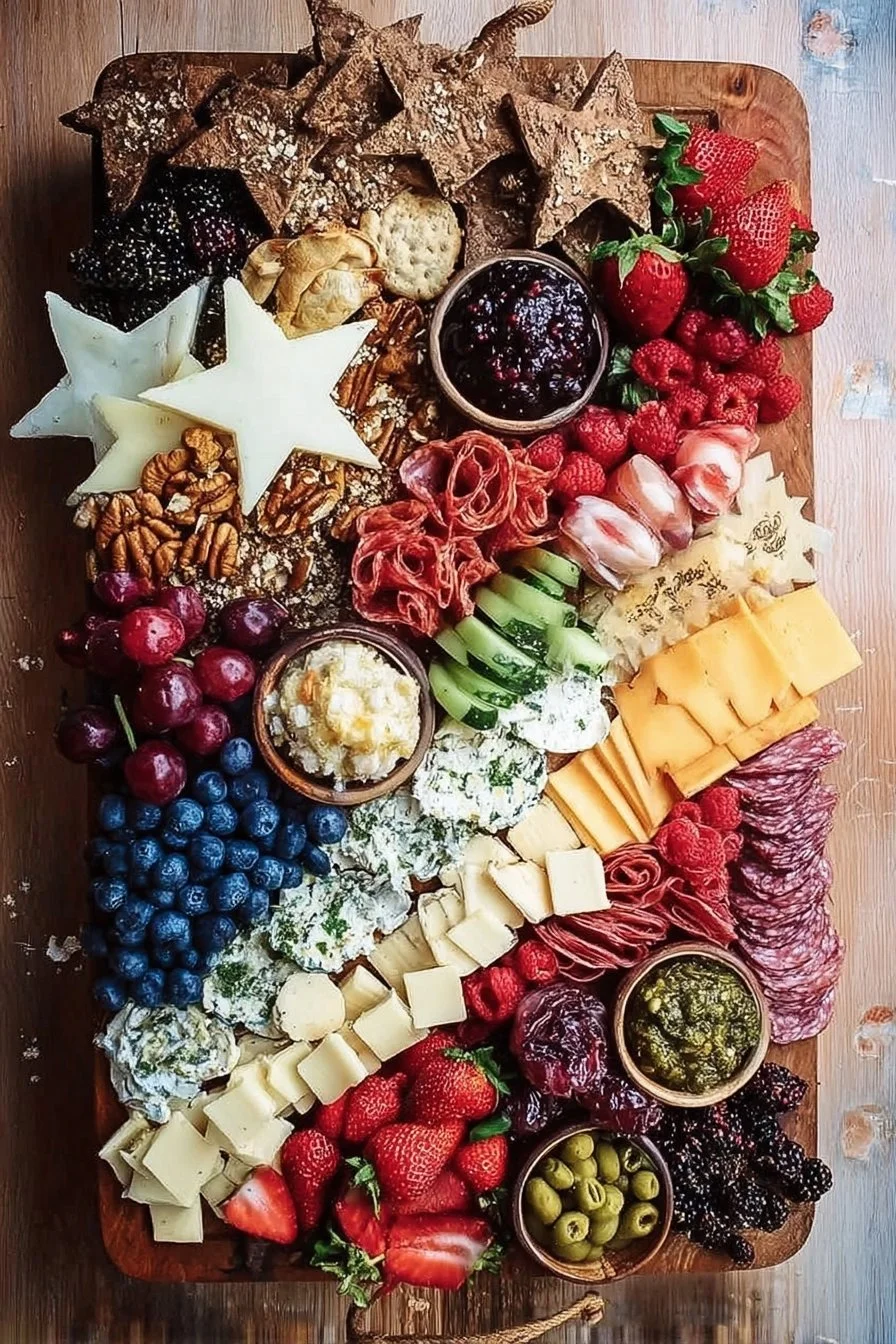
It’s summertime, and what better way to celebrate the 4th of July than with a stunning charcuterie board? This delightful spread not only looks impressive but is also perfect for sharing with family and friends during your holiday gatherings. Imagine vibrant colors, tantalizing flavors, and of course, that creamy, delicious Tillamook cheese as the star of the show. Perfect for picnics, backyard parties, or just a cozy evening at home, this charcuterie board is bound to be a hit!
Why this charcuterie board is a must-try
What makes this charcuterie board special? For starters, it’s the ideal combination of flavors and textures that pleases every palate. From savory cheeses to sweet fruits and crunchy nuts, it’s a sensory feast.
"This charcuterie board took my 4th of July gathering to the next level—everyone was raving about it!" – An avid home cook
Perfect for summer celebrations, this recipe is quick to assemble, budget-friendly, and kid-approved. Whether you are hosting a holiday party or simply enjoying a relaxed weekend, creating a charcuterie spread allows you to be as creative as you like, all while providing something for everyone.
Creating the ultimate charcuterie experience
Pulling together a picture-perfect charcuterie board is easier than you might think. Let’s break down the process, so you’re well-prepared to impress your guests.
- Pick Your Board: Choose a large wooden or slate board for a rustic touch.
- Arrange Your Ingredients: Start with the largest items and fill gaps with smaller, bite-sized components.
- Color and Texture: Incorporate a variety of ingredients for visual appeal and diverse flavors.
This not only forms a beautiful display but ensures your guests are sampling a little bit of everything.
What you’ll need
Creating this charcuterie board is simple, but gathering the right ingredients makes all the difference. Here’s a list to get you started:
- Tillamook cheese (varieties of your choice)
- Cured meats (prosciutto, salami, with optional vegetarian options)
- Fresh fruits (grapes, berries, figs)
- Dried fruits (apricots, raisins)
- Nuts (almonds, walnuts)
- Crackers and breadsticks
- Jams or honey for a touch of sweetness
- Fresh herbs for garnish (like rosemary)
Feel free to swap out any ingredients based on what you have available or your dietary preferences!
Step-by-step instructions
Now that you have your ingredients ready, let’s dive into constructing your charcuterie board.
- Prep the Ingredients: Start by cutting the Tillamook cheese into bite-sized pieces and slicing your cured meats.
- Create a Base: Place the larger cheese blocks or bowls of dips in the center of your board.
- Fill in the Gaps: Arrange your cured meats around the cheese, followed by clusters of fresh and dried fruits.
- Add Crunch: Fill in spaces with nuts, crackers, or breadsticks for added crunch.
- Finish with Garnishes: Drizzle honey on the cheese or jam, and sprinkle fresh herbs for that finishing touch.
There’s no wrong way to create a charcuterie board, so have fun with it!
Best ways to enjoy it
When it comes to serving your beautiful charcuterie board, presentation is key. Here are some creative ways to serve it up:
- Pairing Suggestions: Complement your cheese with a selection of wine or craft beers for an elevated experience.
- Themed Boards: Create seasonal boards with specific color schemes—think red berries and white cheeses for the 4th of July celebration.
- Personal Touches: Consider including labels for each item so guests can mix and match their perfect bites.
The key is to encourage sharing and tasting; this is a dish meant to bring people together.
Storage and reheating tips
Leftovers? No problem! Here’s how to store your charcuterie board safely:
- Refrigeration: Wrap any remaining cheese, meats, or fruits in plastic wrap and store them in an airtight container. They’re best enjoyed within a couple of days.
- Freezing: Hard cheeses can be frozen, but soft cheeses and meats are best kept fresh.
- Reheating: Simply let your cheeses come back to room temperature before serving again to enjoy that creamy texture.
Pro chef tips
A few helpful tips can take your charcuterie board from ordinary to extraordinary:
- Cheese Variety: Include soft, hard, and blue cheeses for contrast.
- Seasonal Picks: Use seasonal fruits and nuts to keep it fresh and vibrant.
- Visual Appeal: Arrange ingredients in a visually pleasing manner, balancing colors and shapes.
These little tricks will help elevate your board and make it uniquely yours!
Creative twists
Once you’ve mastered the classic version, why not explore some creative variations?
- International Flavors: Try Mediterranean olives and cheeses or add Mexican-inspired salsas and tortilla chips.
- Dietary Adjustments: Make a vegan version with plant-based cheeses and nuts.
- Sweet Additions: Incorporate dark chocolate or a selection of macarons for a dessert twist.
Experimenting with flavor profiles can bring a whole new life to your charcuterie experience.
Common questions
How long does it take to prepare?
You can have this board ready in about 30 minutes! It’s a quick and enjoyable project.
Can I prepare it ahead of time?
Absolutely! You can prep your ingredients a few hours in advance, just store them properly to keep everything fresh.
What if I have leftovers?
Leftovers can be enjoyed within 2-3 days if stored correctly in the fridge. Just reassemble as needed!
Crafting the perfect charcuterie board, especially for a festive occasion like the 4th of July, not only feeds the body but also delights the senses and sparks conversations. So gather your friends and family, and enjoy a celebration filled with flavors and fun!
Charcuterie Board
Ingredients
Cheese and Meats
- 1 block Tillamook cheese (varieties of your choice) Cut into bite-sized pieces
- 8 oz Cured meats (prosciutto, salami) Optional vegetarian options available
Fruits
- 1 cup Fresh fruits (grapes, berries, figs)
- 1 cup Dried fruits (apricots, raisins)
Crunchy Elements
- 1 cup Nuts (almonds, walnuts)
- 1 box Crackers and breadsticks
Sweeteners and Garnish
- 1 jar Jams or honey For a touch of sweetness
- 1 bunch Fresh herbs (like rosemary) For garnish
Instructions
Preparation
- Start by cutting the Tillamook cheese into bite-sized pieces and slicing your cured meats.
Assembly
- Place the larger cheese blocks or bowls of dips in the center of your board.
- Arrange your cured meats around the cheese, followed by clusters of fresh and dried fruits.
- Fill in spaces with nuts, crackers, or breadsticks for added crunch.
- Drizzle honey on the cheese or jam and sprinkle fresh herbs for that finishing touch.