
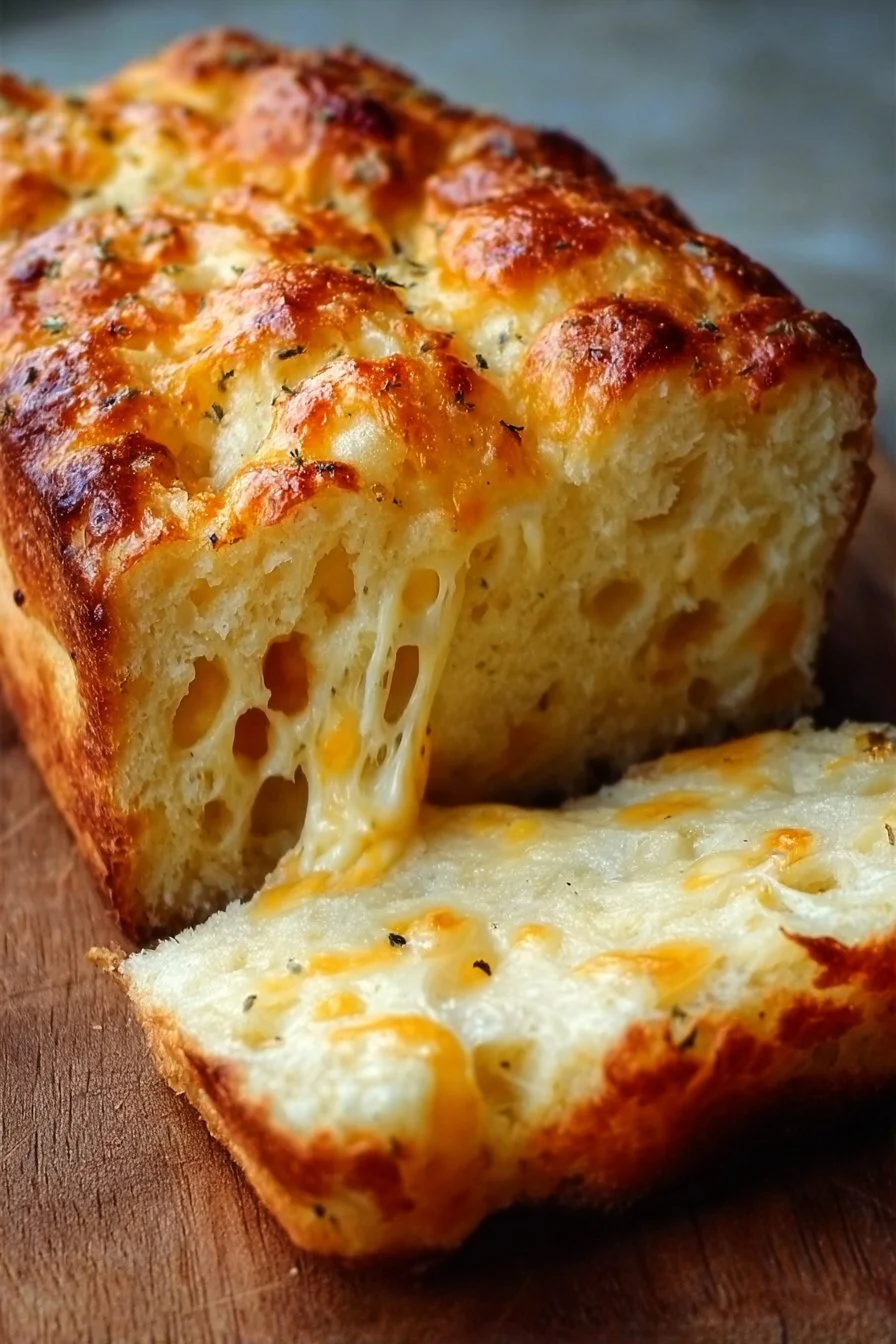
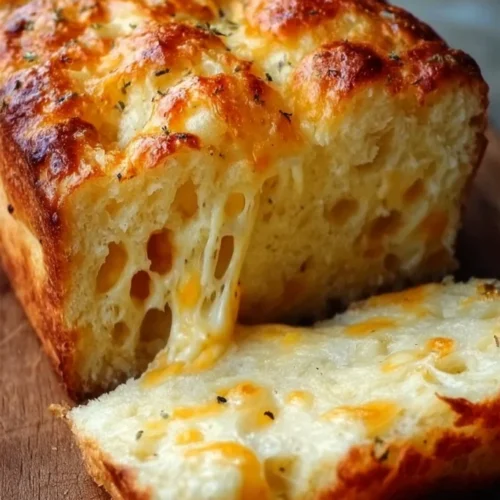
This cheese bread is everything you want from a quick loaf: a golden crust, a tender crumb studded with melty pockets of cheese, and a savory, buttery flavor that’s irresistibly simple. It comes together from pantry staples in under an hour and needs only one bowl for the dry ingredients and one for the wet — perfect for busy weeknights, last-minute guests, or a cozy brunch. Serve warm with butter, smear a little jam on a slice for a sweet-savory contrast, or tuck it alongside soup for an instant comfort meal. If you’re a cheddar fan, you might also enjoy a similar loaf with extra tang: Irresistibly Easy Cheddar Cheese Quick Bread.
Why You’ll Love This Cheese Bread Easy Quick Bread
- Super quick: no yeast, no rising — ready to bake in about 10 minutes.
- Simple ingredients you likely already have in your pantry.
- Rich cheesy flavor with a tender, moist crumb.
- Versatile: great for breakfast, sandwiches, sides for soups and salads.
- Kid-friendly and crowd-pleasing — melts and browns nicely.
- Easy to customize with add-ins or different cheeses (see variations).
- Sturdy enough to slice for sandwiches yet soft enough to enjoy warm with butter.
What Is Cheese Bread Easy Quick Bread?
This Cheese Bread Easy Quick Bread is a quick-bake loaf made with all-purpose flour, baking powder, a touch of salt, shredded cheese, milk, oil, and an egg. It’s a non-yeast “quick bread” that relies on baking powder for lift, so there’s no waiting for it to rise — you mix, pour, and bake. The texture is moist and tender, with a golden crust and pockets of melty cheese throughout. It’s typically served warm as a side for soups, stews, salads, or as a filling breakfast or snack. The overall vibe is unfussy comfort food — easy to make, satisfying, and homey.

Ingredients for Cheese Bread Easy Quick Bread
For the loaf
- 2 cups all-purpose flour (about 240 g)
- 1 tablespoon baking powder
- 1/2 teaspoon salt
- 1 cup shredded cheese (cheddar or your choice) (about 113 g)
- 1 cup milk (240 ml)
- 1/4 cup vegetable oil (60 ml)
- 1 egg
Ingredient Notes (Substitutions, Healthy Swaps)
- Dairy alternatives: Use unsweetened plant-based milk (soy or oat) in place of milk. Texture may be slightly different but will still work.
- Cheese options: Cheddar gives a classic sharp flavor, but Gruyère, Monterey Jack, Colby, or a mild mozzarella are all fine. For stronger flavor use sharper cheeses.
- Lower-fat swaps: Swap vegetable oil for light olive oil or a neutral-tasting oil; you can reduce oil slightly but don’t eliminate it entirely or the loaf may be dry.
- Gluten-free option: Replace the all-purpose flour with a 1:1 gluten-free blend that contains xanthan gum and follow the same measurements. Texture may be a touch more crumbly.
- Egg substitute: For an egg-free version, whisk 3 tablespoons of ground flaxseed with 3 tablespoons water (let sit 5 minutes) and use in place of the egg — note the texture will be slightly denser.
- Budget swaps: Use a medium-cheddar block grated at home — it melts better and is often more affordable than pre-shredded cheese.
Step-by-Step Instructions
Step 1 – Prep and preheat
Preheat your oven to 350°F (175°C) and grease a standard loaf pan (8×4 or 9×5). Greasing prevents sticking and helps the crust brown evenly.
Visual cue: The oven should be fully preheated so the loaf begins baking immediately.
Step 2 – Mix dry ingredients
In a mixing bowl, combine 2 cups all-purpose flour, 1 tablespoon baking powder, and 1/2 teaspoon salt. Whisk briefly to distribute the baking powder evenly.
Visual cue: The dry mix should look uniform with no clumps of baking powder.
Step 3 – Add the cheese
Stir in 1 cup shredded cheese until evenly distributed through the dry mixture. This helps prevent the cheese from sinking to the bottom.
Pro cue: Tossing the cheese with the flour mixture helps suspend it in the batter so you get cheesy pockets rather than a pile of cheese on one side.
Step 4 – Whisk the wet ingredients
In another bowl, whisk together 1 cup milk, 1/4 cup vegetable oil, and 1 egg until smooth. Make sure the egg is fully incorporated so the batter binds properly.
Visual cue: The wet mix should be smooth and slightly glossy.
Step 5 – Combine wet and dry
Pour the wet ingredients into the dry ingredients and stir until just combined. Avoid overmixing — a few small lumps are okay.
Pro cue: Overmixing develops gluten and can make the loaf tough; stir until you no longer see dry flour streaks.
Step 6 – Bake
Pour the batter into the greased loaf pan and smooth the top. Bake for 30–35 minutes, or until a toothpick inserted in the center comes out clean and the top is golden brown.
Visual cue: The top should be evenly golden with the edges pulling away slightly from the pan.
Step 7 – Cool and serve
Allow the bread to cool in the pan for a few minutes, then turn out onto a wire rack. Slice and serve warm.
Pro cue: Letting it cool briefly (5–10 minutes) allows the crumb to set so slices are neater but still warm enough to enjoy melty cheese.
Pro Tips for Success
- Use freshly measured flour: Spoon the flour into the cup and level with a knife to avoid packing too much flour.
- Grate cheese from a block: Pre-shredded cheese often contains anti-caking agents that can slightly affect melting; freshly grated melts more uniformly.
- Don’t overmix: Stir only until combined. Overworking leads to a denser loaf.
- Check doneness early: Ovens vary — start checking at 28 minutes to avoid overbaking.
- Cool briefly before slicing: Slicing too hot makes the loaf crumble; 5–10 minutes is usually ideal.
- Pan choice matters: A darker metal pan will brown faster; if using one, tent the top with foil in the last 5–8 minutes if it browns too quickly.
- Adjust cheese amount: If you prefer cheesier bread, add up to 1 1/4 cups shredded cheese, being mindful of added salt.
Flavor Variations (Optional)
- Spicy version: Stir in 1–2 teaspoons finely chopped jalapeño and 1/2 teaspoon smoked paprika for a kick.
- Herb and garlic: Fold in 1 tablespoon chopped fresh chives or 1 teaspoon dried Italian seasoning and 1/2 teaspoon garlic powder.
- Extra cheesy: Replace half the cheddar with a sharper cheese (like aged cheddar) and add 1/4 cup grated Parmesan on top before baking.
- Veggie boost: Add 1/2 cup finely chopped spinach or cooked, drained corn kernels for color and texture.
- Lighter version: Use 2% milk and reduce oil to 3 tablespoons; the crumb will be slightly less rich but still tasty.
- Savory-sweet twist: Mix in 2 tablespoons finely chopped sun-dried tomatoes and 1/4 teaspoon oregano for a Mediterranean note.
For more ideas on cheddar-forward quick loaves, check this related Cheddar Cheese Quick Bread Recipe to inspire different add-ins and serving ideas.
Serving Suggestions
- With soup: Serve warm slices alongside tomato soup, chili, or a creamy potato soup.
- Brunch board: Slice and include on a brunch platter with eggs, fresh fruit, and cured cheeses (non-pork options).
- Sandwiches: Use thick slices as the base for grilled ham-and-cheese (omit pork if avoiding) or roast-vegetable sandwiches.
- Breakfast: Toast lightly and smear with butter or cream cheese for a morning treat.
- Appetizer: Cut into cubes and serve with a mustard dip or herb butter for parties.
- Picnic: Pack slices for a portable, savory option that travels well.
Make-Ahead, Storage & Reheating
- Make-ahead: You can mix the batter and keep it covered in the fridge for up to 24 hours before baking; baking time may increase by a few minutes from chilled.
- Refrigerator storage: Store baked slices in an airtight container or wrapped tightly for up to 3–4 days. The crust will soften over time.
- Reheating methods:
- Oven: Reheat slices at 350°F (175°C) for 8–10 minutes for best texture.
- Toaster oven: Toast on medium until warmed through and slightly crisp.
- Microwave: Microwave a slice for 15–25 seconds; texture will be softer and less crisp.
- Texture note: Refrigeration can make the crumb slightly firmer; reheat to restore softness and help the cheese become melty again.
Storage and Freezing Instructions
- Freezing the loaf: This bread freezes well. Cool completely, wrap tightly in plastic wrap, then in foil or a freezer-safe bag. Freeze for up to 2–3 months.
- Freezing slices: For convenience, slice first and freeze single or double slices separated by parchment paper for easy grab-and-reheat portions.
- Thawing: Thaw overnight in the refrigerator or on the counter for a few hours. Reheat in a 350°F (175°C) oven for 8–12 minutes or in a toaster oven for a couple of minutes.
- If you plan to freeze, avoid adding delicate fresh herbs prior to freezing — add them when serving for best flavor and appearance.
Nutrition Facts (Per Serving)
| Calories | Protein | Carbs | Fat | Fiber | Sodium |
|———|——–|——|—–|——|——-|
| 255 kcal | 8 g | 25 g | 14 g | 1 g | 430 mg |
Nutrition values are estimates and may vary depending on ingredients and portion sizes.
FAQ About Cheese Bread Easy Quick Bread
Q: Why did my bread come out dense?
A: Likely overmixing or too much flour. Stir until just combined and measure flour by spooning into the cup and leveling.
Q: Why did the cheese sink to the bottom?
A: Toss the cheese in the dry flour mixture before adding wet ingredients — this helps suspend it in the batter.
Q: How do I know when it’s done?
A: It’s done when the top is golden and a toothpick inserted in the center comes out clean or with a few moist crumbs, not wet batter.
Q: Can I make this dairy-free?
A: Yes — use plant-based milk and dairy-free shredded cheese. Texture and flavor will vary slightly.
Q: What’s the best way to reheat slices?
A: Oven or toaster oven for a few minutes at 350°F (175°C) gives the best texture; microwave if you need it quickly.
Q: Can I halve the recipe?
A: Yes, but bake in a smaller pan and check doneness earlier; baking time will be shorter.
Notes
- Slice when slightly cooled for the best presentation; warm slices are ideal for serving but may crumble if cut immediately.
- Sprinkle a little extra shredded cheese on top in the last 5 minutes of baking for a crisp cheesy crust.
- Taste and adjust salt if you change cheeses — sharper cheeses can be saltier and may require less added salt.
- For an attractive finish, brush the top lightly with oil before baking to encourage even browning.
- If using a dark or glass pan, reduce oven temperature by 25°F and monitor doneness to prevent overbrowning.
Cheese Bread Easy Quick Bread
Ingredients
For the loaf
- 2 cups all-purpose flour About 240 g
- 1 tablespoon baking powder
- 1/2 teaspoon salt
- 1 cup shredded cheese Cheddar or your choice, about 113 g
- 1 cup milk 240 ml
- 1/4 cup vegetable oil 60 ml
- 1 large egg
Instructions
Preparation
- Preheat your oven to 350°F (175°C) and grease a standard loaf pan (8x4 or 9x5).
- In a mixing bowl, combine 2 cups all-purpose flour, 1 tablespoon baking powder, and 1/2 teaspoon salt. Whisk briefly.
- Stir in 1 cup shredded cheese until evenly distributed.
- In another bowl, whisk together 1 cup milk, 1/4 cup vegetable oil, and 1 egg until smooth.
- Pour the wet ingredients into the dry ingredients and stir until just combined.
Baking
- Pour the batter into the greased loaf pan and smooth the top.
- Bake for 30–35 minutes, or until a toothpick inserted comes out clean.
Cooling and Serving
- Allow the bread to cool in the pan for a few minutes, then turn out onto a wire rack.
- Slice and serve warm.