
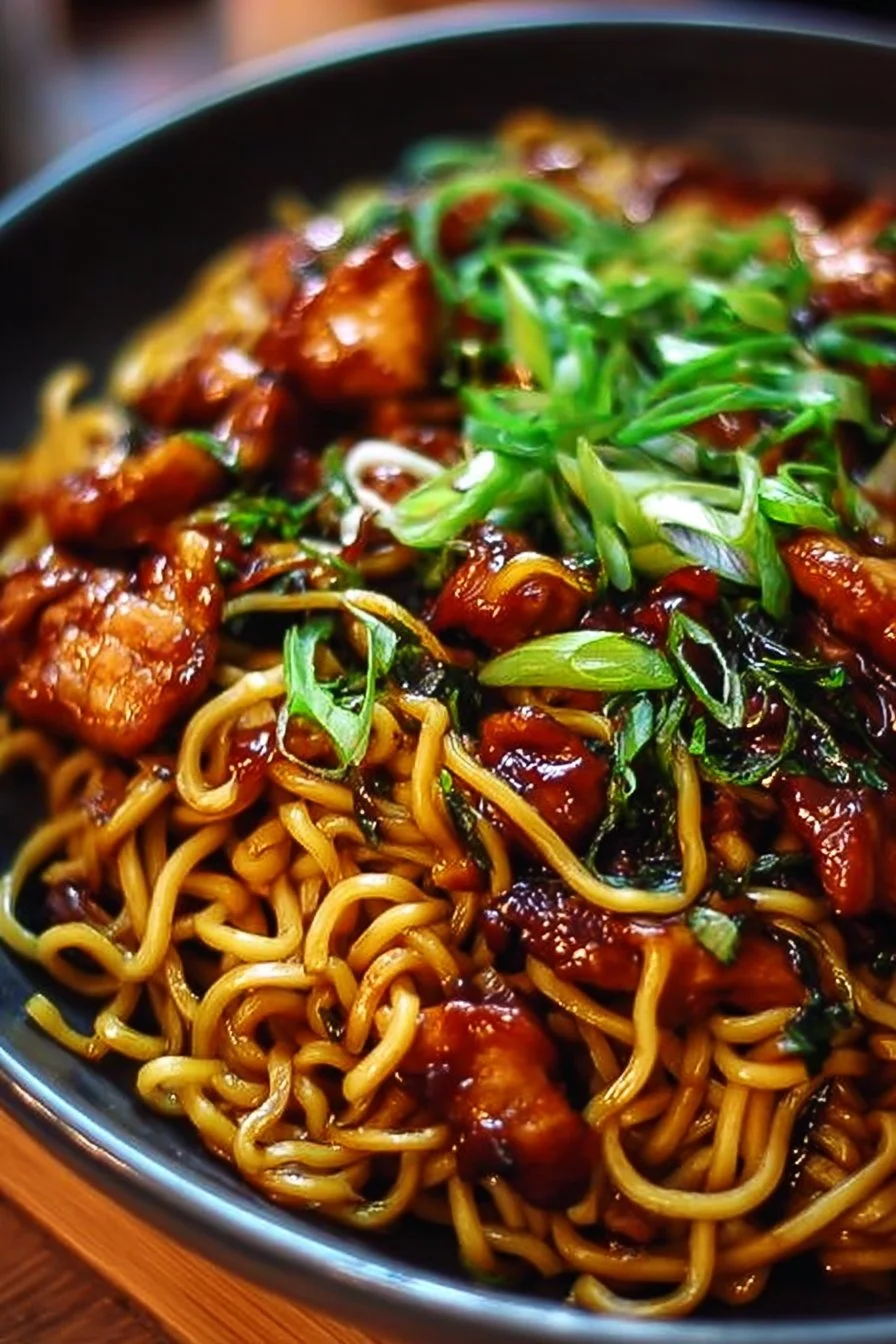
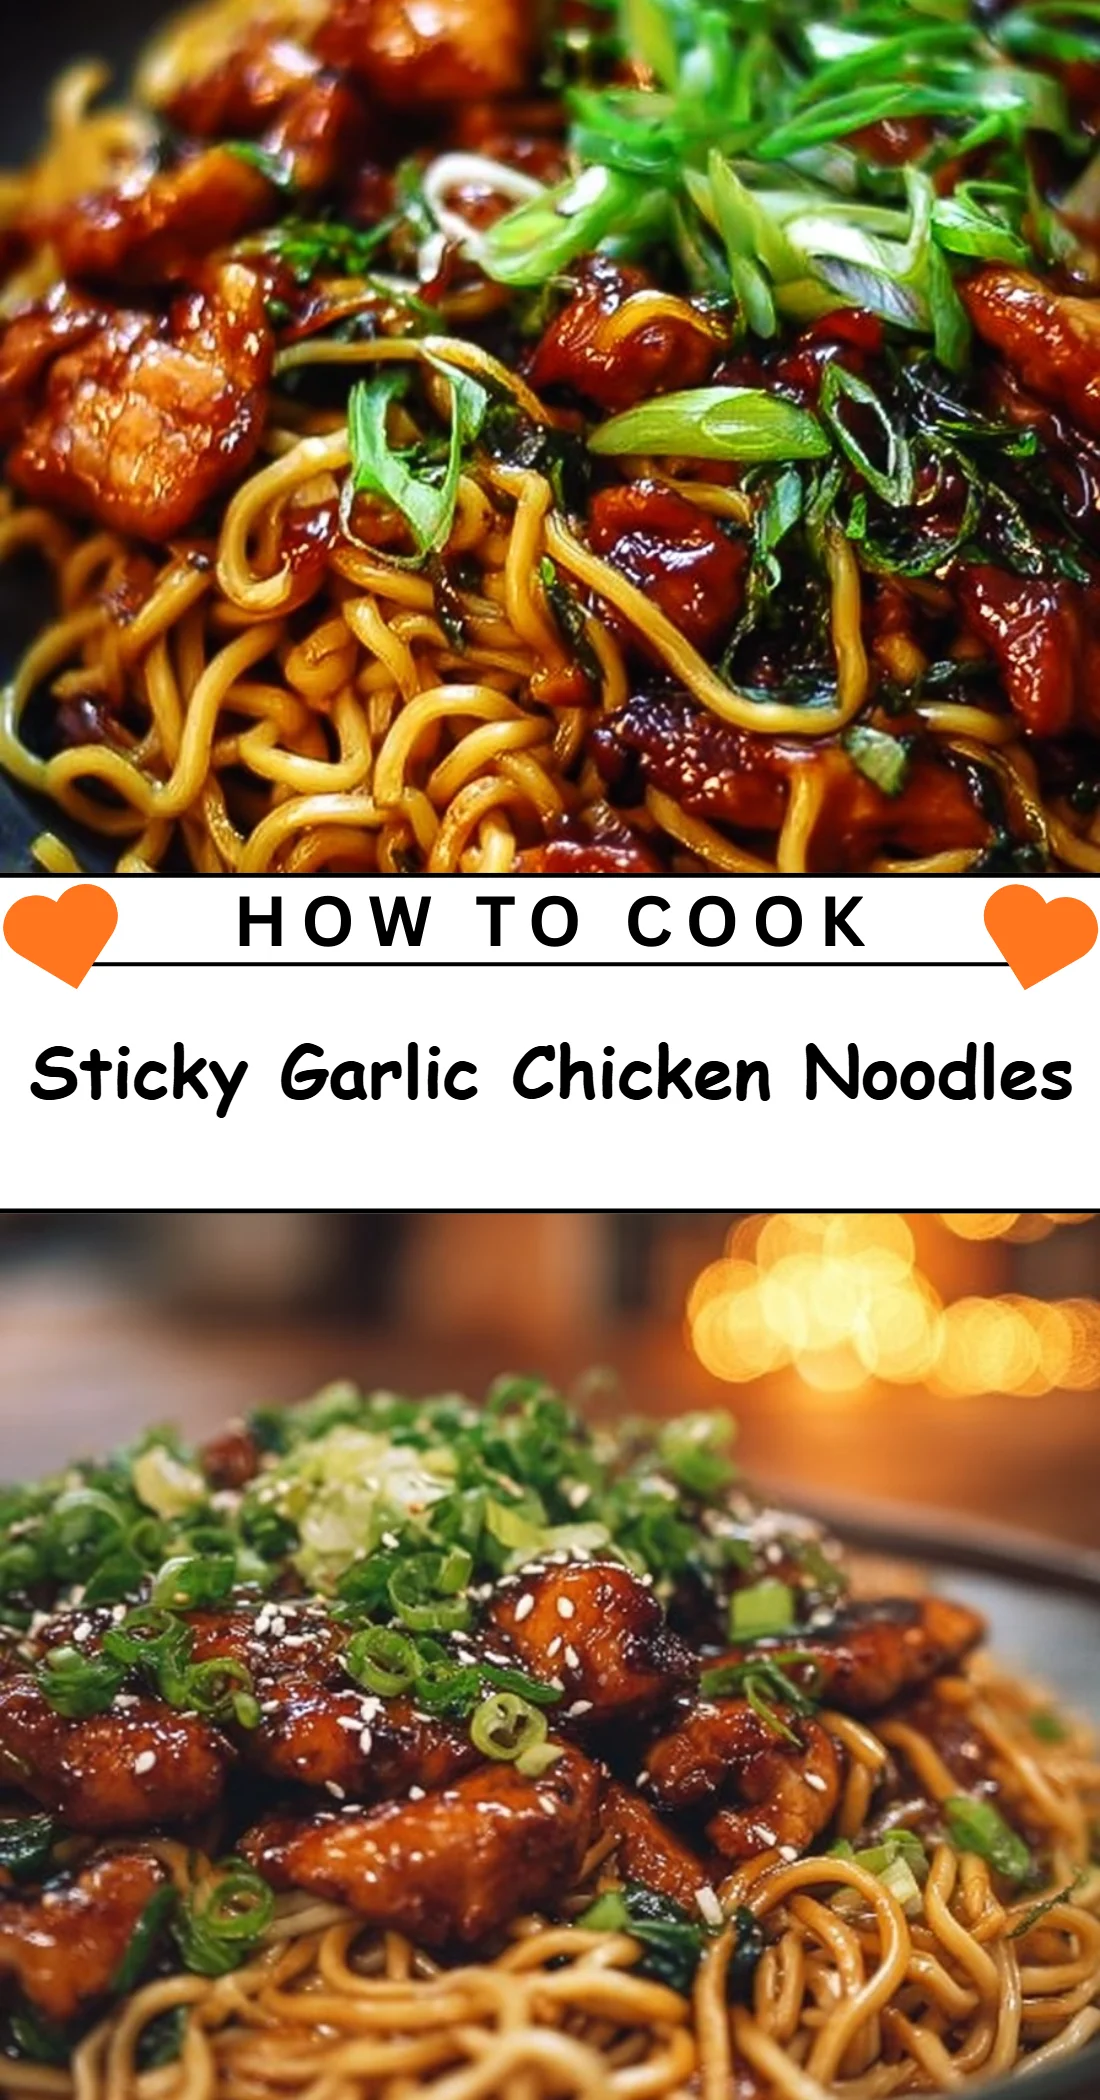
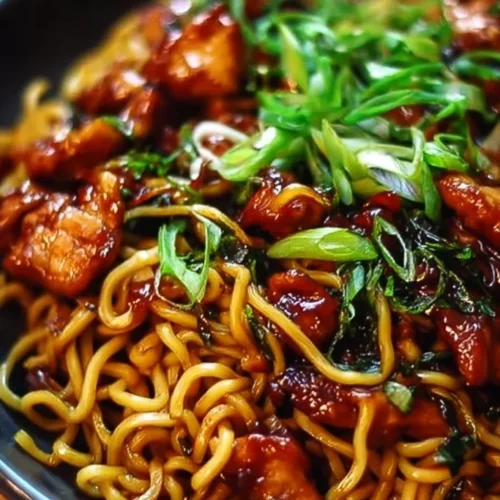
Warm, sticky, and impossibly satisfying, these Sticky Garlic Chicken Noodles hit all the comfort-food notes: tender slices of chicken glazed in a sweet-savory honey-soy sauce, fragrant garlic and ginger, and silky noodles that soak up every bit of that glossy coating. It’s a weeknight hero — quick enough for a busy evening but flavorful enough to feel like a treat. Serve it family-style straight from the skillet with a scattering of green onions and sesame seeds for contrast, or plate it neatly with a crisp side salad for a lighter meal. If you enjoy easy, bold noodle dishes, you might also appreciate the way this recipe echoes popular Asian-inspired bowls like chicken teriyaki noodles while staying ultra-simple to make.
Why You’ll Love This Sticky Garlic Chicken Noodles
- Bold sweet-and-salty flavor from soy sauce and honey that clings to the chicken and noodles.
- Fast to make: ready in roughly 20–30 minutes using pantry staples.
- Minimal ingredients and one-skillet finish make cleanup easy.
- Versatile: works with egg or rice noodles depending on what you have.
- Balanced texture: tender chicken, soft noodles, and bright, crunchy green onions.
- Great for meal prep or weeknight dinners — reheats well and still tastes great.
- Kid-friendly and easy to customize with optional add-ins.
- Comforting and satisfying without being heavy.
What Is Sticky Garlic Chicken Noodles?
Sticky Garlic Chicken Noodles is a quick stir-fry-style dish where thinly sliced chicken is seared, flavored with garlic and ginger, and finished with a glossy honey-soy glaze that clings to both the meat and noodles. The taste is savory and slightly sweet with a warm garlic-ginger backbone; textures range from the chew of noodles to the tender bite of chicken and the fresh snap of green onions. This dish is typically cooked on the stovetop in a large skillet or wok and is a classic weeknight or casual dinner option — comforting, fast, and crowd-pleasing.
Ingredients for Sticky Garlic Chicken Noodles
For the Base
- 8 oz noodles (egg or rice noodles)
- 1 lb chicken breast, sliced
For the Sauce
- 3 tablespoons soy sauce
- 2 tablespoons honey
- 4 cloves garlic, minced
- 1 tablespoon ginger, minced
- 2 tablespoons vegetable oil
For Serving
- 2 green onions, sliced
- Sesame seeds for garnish (optional)
Ingredient Notes (Substitutions, Healthy Swaps)
- Noodles: Egg noodles give a slightly richer flavor and firmer bite; rice noodles make the dish gluten-free if you use a gluten-free soy sauce. Stick to the 8 oz amount for balance.
- Chicken: Use skinless boneless chicken breast as listed; if you prefer darker meat, boneless skinless thighs can be substituted (optional).
- Soy sauce: For lower sodium, use low-sodium soy sauce; flavor will be slightly less salty but still delicious.
- Honey: Swap with maple syrup for a different sweetness profile. For a lower-sugar option, reduce to 1 tablespoon and add a splash of water to maintain sauciness.
- Garlic & ginger: Fresh is best for aroma and flavor. Powdered versions will work in a pinch but reduce amounts (½ teaspoon each) and expect a less vibrant taste.
- Oil: Vegetable oil is neutral; you can use canola or another neutral oil. Do not use strong-flavored oils that would compete with garlic and ginger.
Step-by-Step Instructions
Use a large skillet or wok and follow these simplified steps to get glossy, sticky noodles every time.
Step 1 – Cook the noodles
- Cook the noodles according to package instructions, then drain and set aside.
Visual cue: The noodles should be tender but not mushy — slightly al dente to hold up during the toss.
Step 2 – Sear the chicken
2. In a large skillet, heat vegetable oil over medium-high heat. Add sliced chicken and cook until browned and cooked through, about 5–7 minutes.
Visual cue: Chicken slices should be golden on the edges with no pink in the center.
Pro cue: Don’t overcrowd the pan — if pieces steam instead of sear, you’ll lose flavor. Work in batches if necessary.
Step 3 – Add aromatics
3. Stir in minced garlic and ginger, cooking for another 1–2 minutes until fragrant.
Visual cue: The skillet will smell aromatic; garlic should be lightly golden but not burnt.
Pro cue: Add garlic toward the end so it flavors the oil without turning bitter.
Step 4 – Make the glaze
4. In a small bowl, mix soy sauce and honey together, then pour over the chicken in the skillet. Stir well to coat.
Visual cue: The sauce should bubble slightly and thicken into a glossy glaze that coats the chicken.
Pro cue: Tilt the pan and spoon the sauce over the chicken to encourage even coating and stickiness.
Step 5 – Toss with noodles
5. Add the cooked noodles to the skillet, tossing to combine everything well. Cook for an additional 2–3 minutes until heated through.
Visual cue: Noodles should be evenly coated and slightly lacquered with the sauce.
Pro cue: Use tongs or two spatulas to gently toss — vigorous stirring can break noodles.
Step 6 – Finish and serve
6. Serve topped with sliced green onions and sesame seeds if desired.
Visual cue: Bright green slivers of onion on glossy noodles make an attractive contrast.
Pro cue: Add sesame seeds at the end for a toasty note and visual appeal.
Pro Tips for Success
- Pre-slice the chicken thinly and evenly for quick, even cooking.
- Heat the pan well before adding the chicken to get a proper sear.
- Use fresh garlic and ginger — they’re the flavor backbone of this dish.
- Don’t overcook noodles; they’ll finish cooking briefly in the pan and absorb sauce.
- If the sauce seems too thick, splash in a tablespoon of water to loosen it and maintain gloss.
- Taste and adjust: if you want more salt, add a little extra soy sauce; for more sweetness, add a teaspoon of honey.
- Keep green onions fresh and add them at the end for crunch and color.
- Rest the chicken slightly after cutting if it’s been chilled — extremely cold meat can lower skillet temperature.
Flavor Variations (Optional)
- Spicy kick (optional): Add 1–2 teaspoons chili garlic sauce or a pinch of red pepper flakes to the soy-honey mix.
- Citrus brightness (optional): Stir in 1 teaspoon of lime juice at the end for a bright lift.
- Veggie boost (optional): Toss in quick-cooking vegetables like snap peas or thinly sliced bell peppers when adding the noodles.
- Sesame upgrade (optional): Replace 1 tablespoon of vegetable oil with 1 tablespoon toasted sesame oil for a nutty flavor — use sparingly as it’s potent.
- Protein swap (optional): Substitute cooked shrimp or tofu for chicken if you prefer a different protein while keeping the same sauce.
- Low-sugar swap (optional): Reduce honey to 1 tablespoon and add 1 teaspoon of low-sodium soy sauce with a splash of water to keep texture.
Serving Suggestions
- Simple sides: Serve with a side of steamed broccoli or bok choy to add greens and balance the sweetness.
- Salad pairing: A crisp cucumber salad or shredded carrot slaw gives a refreshing contrast.
- Family-style plating: Place the skillet at the center of the table for communal serving and garnish at the table so everyone gets fresh green onions.
- Special occasion: Dress it up with a few slices of avocado and an extra sprinkle of toasted sesame seeds.
- Lunchbox idea: Pack leftovers with a wedge of lime; reheat gently and squeeze lime over before eating.
- If you enjoy richer noodle bowls, try the creamy take on chicken noodles like creamy garlic chicken ramen for a saucier sibling dish.
Make-Ahead, Storage & Reheating
- Make-ahead: Cook the noodles and chicken separately, toss with the sauce just before serving to keep noodles from getting soggy.
- Refrigerator storage: Cool completely and store in an airtight container for up to 3–4 days.
- Reheating on stovetop: Add a splash of water or a few drops of oil to a skillet over medium heat and gently toss until heated through.
- Reheating in microwave: Warm in 30–45 second intervals, stirring between bursts to prevent hot spots.
- Texture note: Noodles can soften after refrigeration; quick pan reheat helps restore texture and re-glazes the sauce.
Storage and Freezing Instructions
- Freezing recommendation: Freezing this dish is possible but not ideal — the noodles may become softer and change texture after thawing.
- If you choose to freeze: Cool completely, portion into airtight freezer containers, and freeze up to 2 months. Thaw overnight in the refrigerator before reheating.
- Alternative: Freeze the cooked chicken and sauce separately from the noodles. Thaw and reheat the chicken with a splash of water or oil, then toss with freshly cooked noodles for the best texture.
Nutrition Facts (Per Serving)
| Calories | Protein | Carbs | Fat | Fiber | Sodium |
|———|——–|——|—–|——|——-|
| 520 kcal | 36 g | 54 g | 14 g | 2 g | 900 mg |
Nutrition values are estimates and may vary depending on ingredients and portion sizes.
FAQ About Sticky Garlic Chicken Noodles
- How do I know when the chicken is cooked through?
- Slice a piece in half; there should be no pink and the juices should run clear. Cook time is about 5–7 minutes for thin slices.
- My sauce is too thin — how do I thicken it?
- Simmer it a bit longer over medium heat until it reduces and becomes glossy. Alternatively, mix ¼ teaspoon cornstarch with 1 tablespoon water and stir into the sauce to thicken.
- Can I use pre-cooked chicken or rotisserie chicken?
- Yes — add shredded pre-cooked chicken when you add the noodles and heat just until warmed through to avoid drying it out.
- Why did my garlic taste bitter?
- Garlic becomes bitter if cooked too long or at too high a heat. Add garlic later in the cooking and watch it carefully; golden and fragrant is ideal.
- How long will leftovers keep in the fridge?
- Stored in an airtight container, this will keep for 3–4 days.
- What’s the best way to reheat without drying the chicken?
- Reheat gently in a skillet with a splash of water or a little oil over medium heat, stirring frequently to recoat with sauce.
Notes
- Plating idea: Twirl a nest of noodles with tongs on a warmed plate and top with chicken slices for a restaurant-style presentation.
- Small flavor upgrade: Finish with a drizzle of toasted sesame oil or a few drops of lime juice for added depth.
- Seasoning adjustments: Taste before serving — if it needs more salt, add a small splash of soy sauce; for more sweetness, a dash of honey will balance it.
- Presentation tip: Slice green onions on the bias for a more elegant look and scatter sesame seeds just before serving for maximum visual and textural contrast.
Sticky Garlic Chicken Noodles
Ingredients
For the Base
- 8 oz noodles (egg or rice noodles) Egg noodles for richer flavor; rice noodles for gluten-free option.
- 1 lb chicken breast, sliced Skinless boneless makes for the best texture.
For the Sauce
- 3 tbsp soy sauce Use low-sodium for a lighter option.
- 2 tbsp honey Can be swapped with maple syrup.
- 4 cloves garlic, minced Fresh preferred for best flavor.
- 1 tbsp ginger, minced Fresh is best but powdered can work in a pinch.
- 2 tbsp vegetable oil Neutral oil recommended, avoid strong flavors.
For Serving
- 2 each green onions, sliced Add fresh for crunch.
- sesame seeds for garnish (optional) Use just before serving for best flavor.
Instructions
Preparation
- Cook the noodles according to package instructions, then drain and set aside.
- In a large skillet, heat vegetable oil over medium-high heat. Add sliced chicken and cook until browned and cooked through, about 5–7 minutes.
- Stir in minced garlic and ginger, cooking for another 1–2 minutes until fragrant.
Cooking
- In a small bowl, mix soy sauce and honey together, then pour over the chicken in the skillet. Stir well to coat.
- Add the cooked noodles to the skillet, tossing to combine everything well. Cook for an additional 2–3 minutes until heated through.
Serving
- Serve topped with sliced green onions and sesame seeds if desired.